How to Use a 1.3 Inch I2C OLED Module With Arduino
Introduction
This tutorial will show you how to use a 1.3 inch I²C OLED display with Arduino.

Materials
Wiring & Setup
Connect the OLED display to the Arduino board as shown in the picture below:
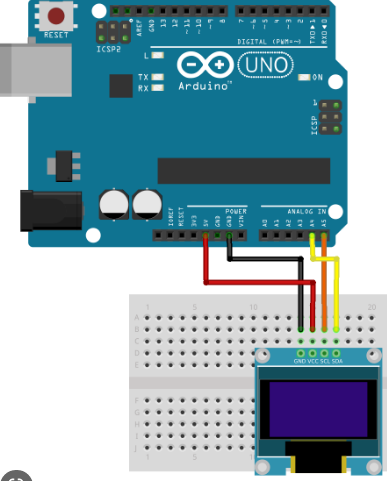
Step 1: Connect the OLED panel to your Arduino board using the I2C pins.
| 1.3 Inch I2C OLED Module | Arduino Pin |
|---|---|
| VCC | 5V |
| GND | GND |
| SCL | A5 (SCL) |
| SDA | A4 (SDA) |
Step 2: Install Libraries.
The libraries that are used are:
- SH1106 (ZIP file, Unavailable Within IDE)
- Adafruit GFX Library (Within IDE)
- Adafruit BusIO (Within IDE)
Click here for instructions to install libraries within the arudino application, and here to add library through ZIP file.
Full Code
Upload the following code to your Arduino board:
#include <Wire.h>
#include <Adafruit_GFX.h>
#include <Adafruit_SH1106.h>

#define OLED_RESET 4
Adafruit_SH1106 display(OLED_RESET);

void setup() {
  display.begin(SH1106_SWITCHCAPVCC, 0x3C);
  display.clearDisplay();
  display.setTextSize(2);
  display.setTextColor(WHITE);
  display.setCursor(0,0);
  display.println("Canada");
  display.println("Robotix!");
  display.display();
}

void loop() {}
}
Programming & Logic
The following code demonstrates how the Oled sensor works and Displays your desired text or image.
#include <Wire.h>
#include <Adafruit_GFX.h>
#include <Adafruit_SH1106.h>
Step 1: Include Libraries: Include Libraries: These lines include the necessary libraries for the code to work. The Wire library is used for I2C communication, the Adafruit GFX library is used for graphics functions, and the Adafruit SH1106 library is used for communicating with the OLED display.
#define OLED_RESET 4
Adafruit_SH1106 display(OLED_RESET);
Step 2: Create Display Object: 2. This line defines the reset pin for the OLED display and creates an instance of the Adafruit_SH1106 class called “display”.
void setup() {
  display.begin(SH1106_SWITCHCAPVCC, 0x3C);
  display.clearDisplay();
  display.setTextSize(2);
  display.setTextColor(WHITE);
  display.setCursor(0,0);
  display.println("Canada Robotix");
  display.display();
}
Step 3: Setup Function: These lines are part of the setup function. The first line initializes the OLED display with SH1106_SWITCHCAPVCC and address 0x3C. The second line clears the display. The third line sets the text size to 2. The fourth line sets the text color to white. The fifth line sets the cursor position to (0,0). The sixth line prints “Canada Robotix” to the display. The seventh line displays the contents of the buffer on the screen.
void loop() {}
Step 4: Loop: This is an empty loop function that does nothing.
Troubleshooting:
-
** Check the wiring: ** Check the wiring: Make sure that all the wires are connected properly and that there are no loose connections.
-
** Check the code:** Make sure that the code is correct and that there are no syntax errors or typos.
-
** Check the library: ** Make sure that you have installed the correct library for your OLED display.
-
** Check the display settings: ** Make sure that the display settings are correct and that you are using the correct address and communication protocol.
-
** Check the power supply: ** Make sure that the power supply is providing enough voltage and current to the display.
-
** Check for compatibility issues: ** Make sure that your Arduino board is compatible with your OLED display.
-
** Check for damaged components: ** Inspect the components on your Arduino board and the OLED display for any visible signs of damage or wear. If you see any damage, replace the damaged components.
Output
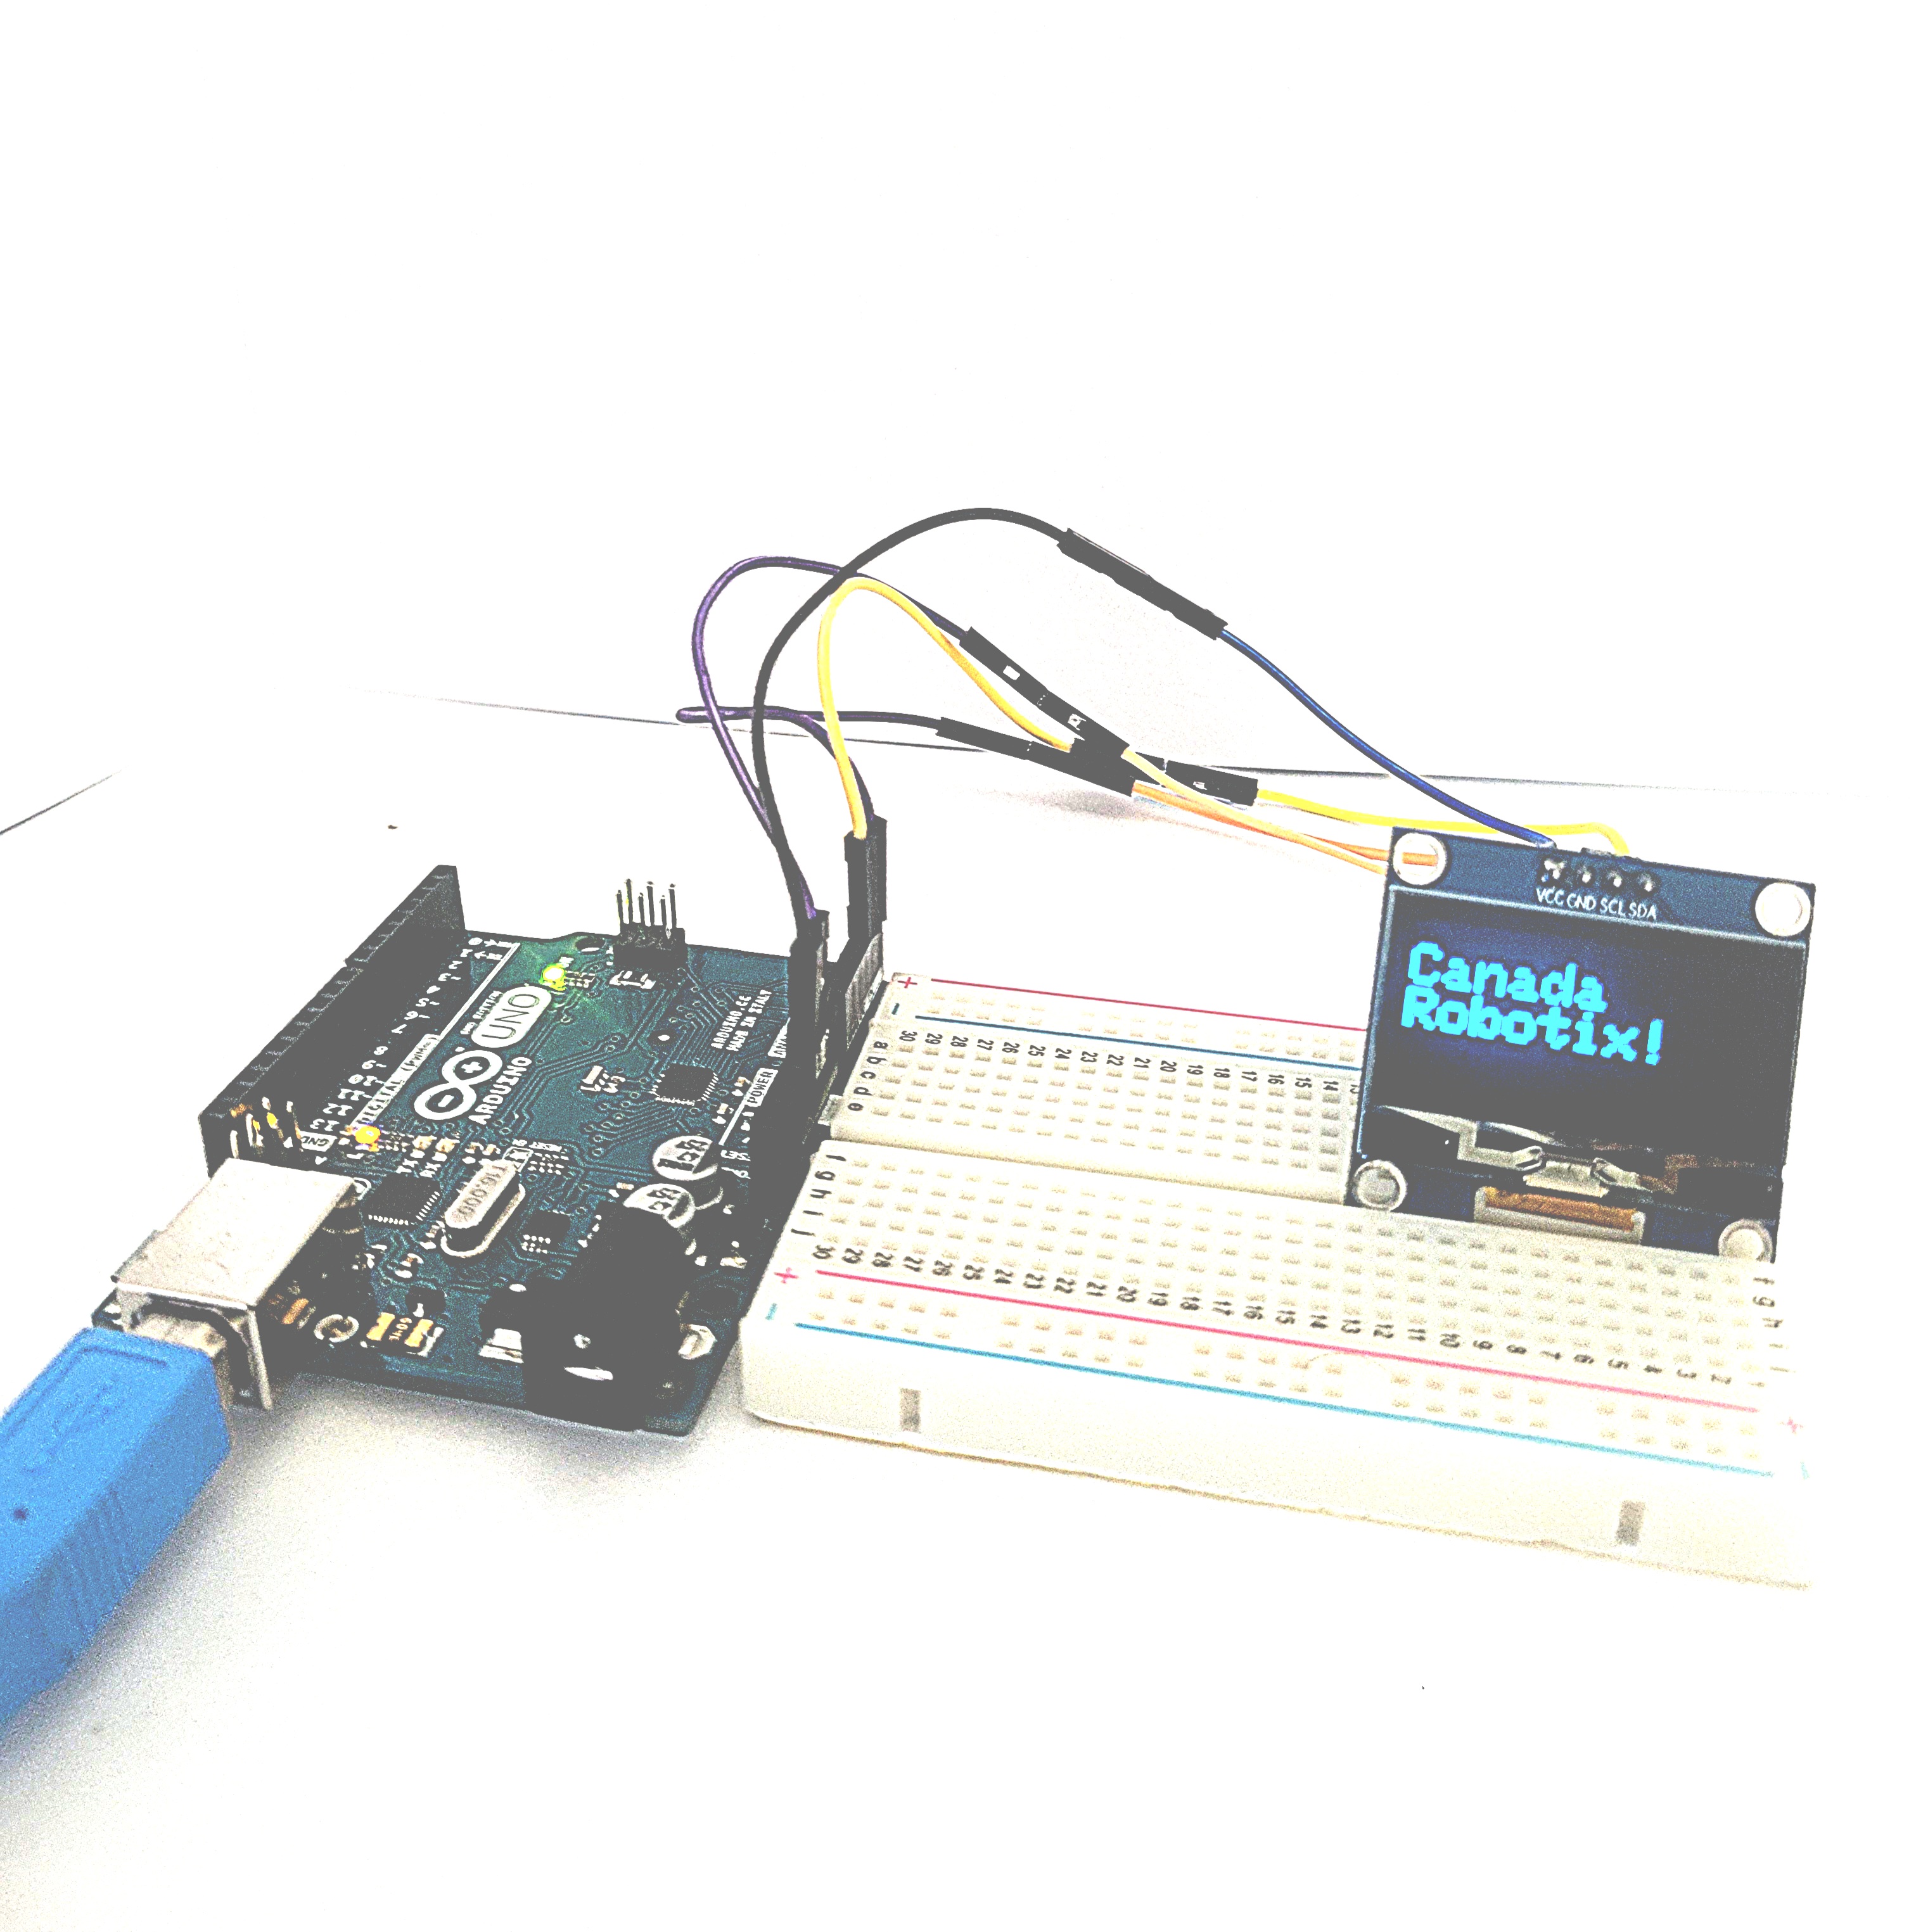
The OLED display will now show the text you chose to display.
Possible applications:
-
** Clocks:** OLED displays can be used to display different types of clocks such as digital clocks, analog clocks, and binary clocks.
-
** Weather Stations:** OLED displays can be used to display weather information such as temperature, humidity, and pressure.
-
** Fitness Trackers: ** OLED displays can be used to display fitness information such as steps taken, calories burned, and heart rate.
-
** Smart Home Devices: ** OLED displays can be used to display information about smart home devices such as temperature, humidity, and light levels.
Conclusion
In conclusion, this tutorial provides a step-by-step guide on how to interface an OLED display with an Arduino board. The tutorial covers the necessary libraries needed for the code to work, how to define the reset pin for the OLED display, how to create an instance of the Adafruit_SH1106 class, and how to set up and display text on the OLED display. Finally, I gave you four examples of possible applications of OLED displays with Arduino. Enjoy!