How to use The 8 LED 32mm Ring NeoPixel
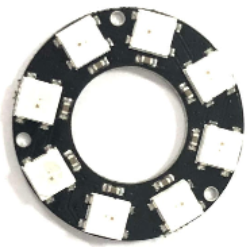
The 8 LED 32mm Ring NeoPixel is a version of the NeoPixel series that includes 8 LEDs in a 32mm ring format. In this guide, we will be using the NeoPixel Compatible WS2812 5050 RGB LED (8 LED 32mm Ring) from our store.
Parts
- NeoPixel Compatible WS2812 5050 RGB LED (8 LED 32mm Ring)
- M/F Jumper wires
- Arduino Uno R3
- Arduino IDE
- Soldering Iron
- Lead Free Solder
Wiring Guide
| NeoPixel | Arduino |
|---|---|
| 5V | 5V |
| GND | GND |
| DI | Pin 6 |
Soldering is required to wire everything properly. Use jumper wires to connect the NeoPixel with the Arduino.
Programming
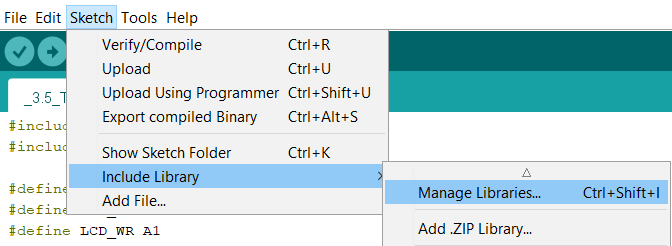
Step 1: Before we start coding, we first have to download the needed libraries.
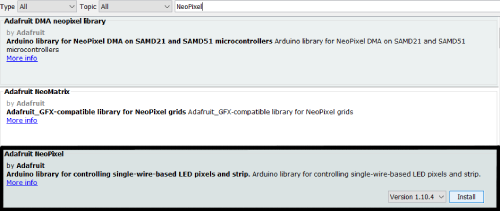
Step 2: Enter NeoPixel and install the highlighted search.
Step 3: Declare your libraries
#include "Adafruit_NeoPixel.h"
Step 4: Declare an object using Adafruit_NeoPixel.
Adafruit_NeoPixel pixels(8, 6, NEO_GRB + NEO_KHZ800);
Adafruit_NeoPixel pixels(# of LEDS, digital pin #, LED type + LED type);
Step 5: Initialize the NeoPixel project.
void setup(){
    pixels.begin();
}
Now that everything has been initialized, you can code whatever you want.
Example
Here are a few commands you can use to control the NeoPixel:
object.setBrightness(0-255); //sets the brightness of the NeoPixels
object.clear(); //clears all the pixels
object.setPixelColor(pixel#, object.Color(R, G, B)); //sets a color for a specific pixel
The (R, G, B) can go from (0, 0, 0) to (255, 255, 255)
object.show(); //shows whatever pixel you have updated with setPixelColor
Here is an example of how to use the 8 LED 32mm Ring NeoPixel.
Step 1: Initialize the NeoPixel.
#include "Adafruit_NeoPixel.h"
#ifdef __AVR__
    #include <avr/power.h> // this is required for 16 MHz Adafruit Trinket
#endif

int PIN = 6;
int NUMPIXELS = 8;

Adafruit_NeoPixel pixels(NUMPIXELS, PIN, NEO_GRB + NEO_KHZ800);

void setup(){
    pixels.begin();
    pixels.setBrightness(10);
}
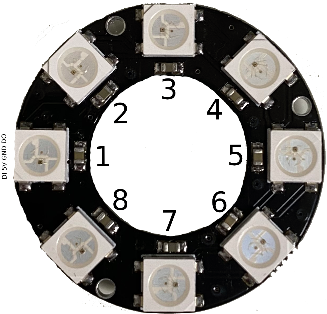
Note: the NUMPIXELS start as 0 and ends as 7, 0 is located on the LED above the pins and the ascending numbers go clockwise
Step 2: Let's start by clearing the NeoPixel to make sure there is nothing on the LEDs.
void loop(){
    pixels.clear();
}
Step 3: Let's create a for loop that makes one LED light up after the other every second.
for(int i = NUMPIXELS; i >= 0; i--){
    pixels.setPixelColor(i, pixels.Color(255, 0, 255)); //this should make a magenta color
    pixels.show();
    delay(1000); //delays for 1 second
}
Full Code
#include "Adafruit_NeoPixel.h"
#ifdef __AVR__
    #include <avr/power.h> // this is required for 16 MHz Adafruit Trinket
#endif

int PIN = 6;
int NUMPIXELS = 8;

Adafruit_NeoPixel pixels(NUMPIXELS, PIN, NEO_GRB + NEO_KHZ800);

void setup(){
    pixels.begin();
    pixels.setBrightness(10);
}

void loop(){
    pixels.clear();
    for(int i = NUMPIXELS; i >= 0; i--){
        pixels.setPixelColor(i, pixels.Color(255, 0, 255)); //this should make a magenta color
        pixels.show();
        delay(1000); //delays for 1 second
    }
}
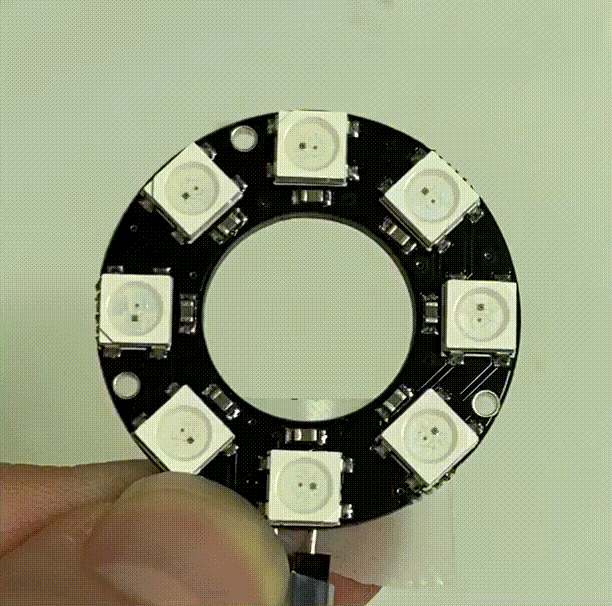
Output