How to use a Humidity and Temperature Sensor (DHT11)
The DHT11 is a basic, low- humidity and temperature sensor. It makes it really easy to add humidity and temperature data to your electronics projects. It is used for remote weather stations, home environmental control systems, and farm or garden monitoring systems.
In this article, we will be talking about the set up and operating the sensor with an Arduino Board.
The DHT11 sensor has some range and accurate for collecting data:
If you want to know more, check out this DHT11 data sheet.
- Humidity Range: 20-90% RH
- Humidity Accuracy: ±5% RH
- Temperature Range: 0-50 °C
- Temperature Accuracy: ±2% °C
- Operating Voltage: 3V to 5.5V
How it works
The DHT11 detects water vapour by measuring the electrical resistance between two electrodes, while it measures temperature with a surface-mounted NTC temperature sensor (thermistor) built into the unit.
It uses just one signal wire to transmit data to the Arduino. Power comes from separate 5V and ground wires. A 10K ohm pull-up resistor is needed between the signal line and 5V line to make sure the signal level stays high by default.
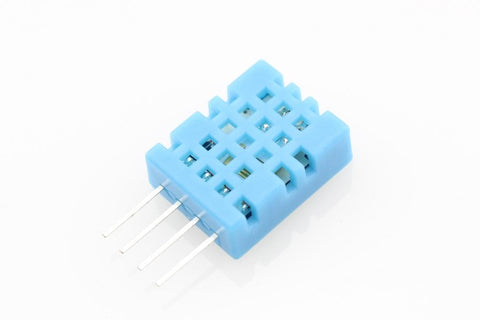
There are two different versions of the DHT11 in the market. One type has four pins, and the other has three pins and is mounted to a small PCB. The PCB-mounted version is nice because it includes a surface-mounted 10K ohm pull-up resistor for the signal line. However, we will be using the DHT11 sensor, the one we carry in our shop for this project.
Parts
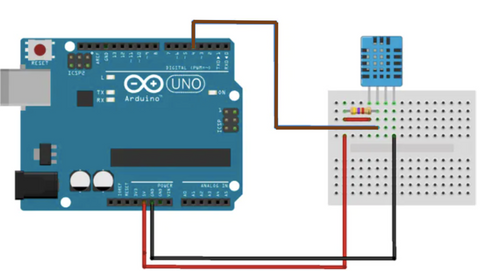
Wiring Guide
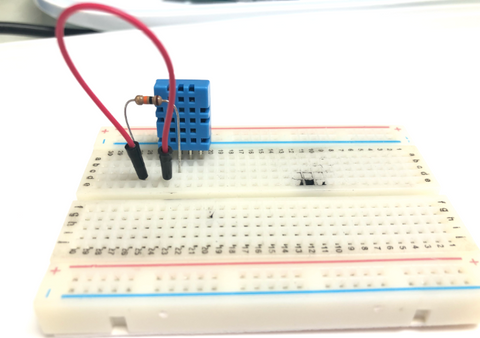
Connect 5V and signal pin with a 10K resistor.
10K resistor

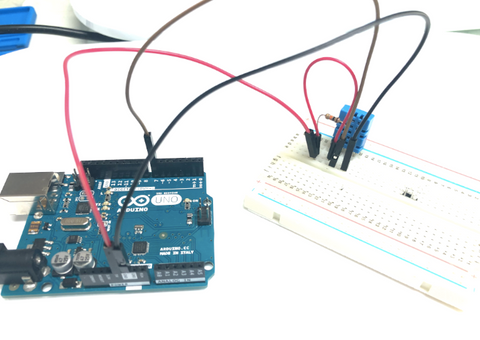
Assembled
Then, connect the male to male jumper wires onto the breadboard.
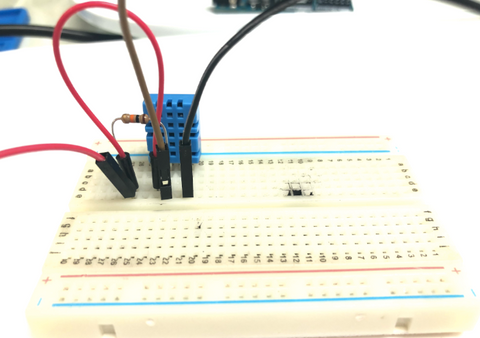
Connect the sensor with Arduino Uno
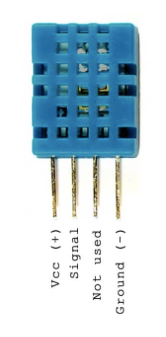
DTH11 VCC (leftmost pin) -- Arduino 5V pin DTH11 Signal (second leftmost pin) -- Arduino D7 pin DTH11 Ground(rightmost pin) -- Arduino GND pin
Programming
The following code demonstrates how the DTH11 sensor works and collects the data. IT will get the humidity and temperature readings from the sensor. If you want to skip all the steps, you can jump to the Full Code.
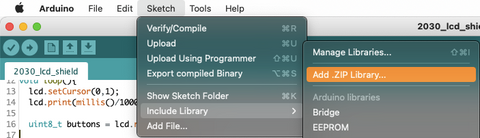
Step 1: Download the DHTLib library.
After downloading the ZIP file, open Arduino and go to Sketch > Include Library > Add .ZIP Library.
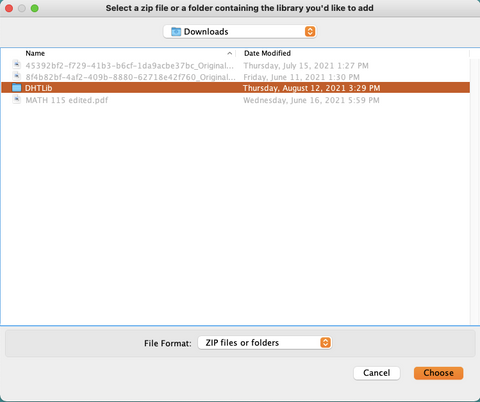
A pop-up window will appear. Click on the " "file and click on Choose on the right bottom corner.
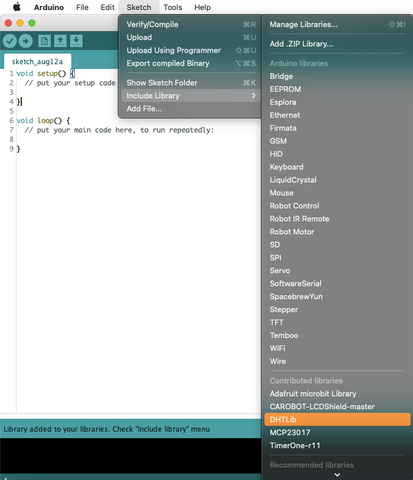
As the window has closed, go to Sketch > Include Library > Contributed libraries. There you will see the library has been added to your Arduino.
Step 2: Include the library in the code
#include <dht.h>
Step 3: Define the sensor connection pin to Arduino Uno
dht DHT;
#define sensor 7
Step 4: Set up serial communication between Arduino Uno and DHT11 sensor.
void setup(){
  Serial.begin(9600);
}
Step 5: Get reading from the sensor.
void loop(){
  int reader = DHT.read11(sensor);
Step 6: Print out the data the sensor has collected onto the Serial Monitor every one second.

Serial.print("Temperature = ");
  Serial.println(DHT.temperature);
  Serial.print("Humidity = ");
  Serial.println(DHT.humidity);
  delay(1000);
}
Full Code
#include <dht.h>

dht DHT;

#define sensor 7

void setup(){
  Serial.begin(9600);
}

void loop(){
  int reader = DHT.read11(sensor);
  Serial.print("Temperature = ");
  Serial.println(DHT.temperature);
  Serial.print("Humidity = ");
  Serial.println(DHT.humidity);
  delay(1000);
}
Output
You should see the humidity and temperature readings displayed at one second intervals.
