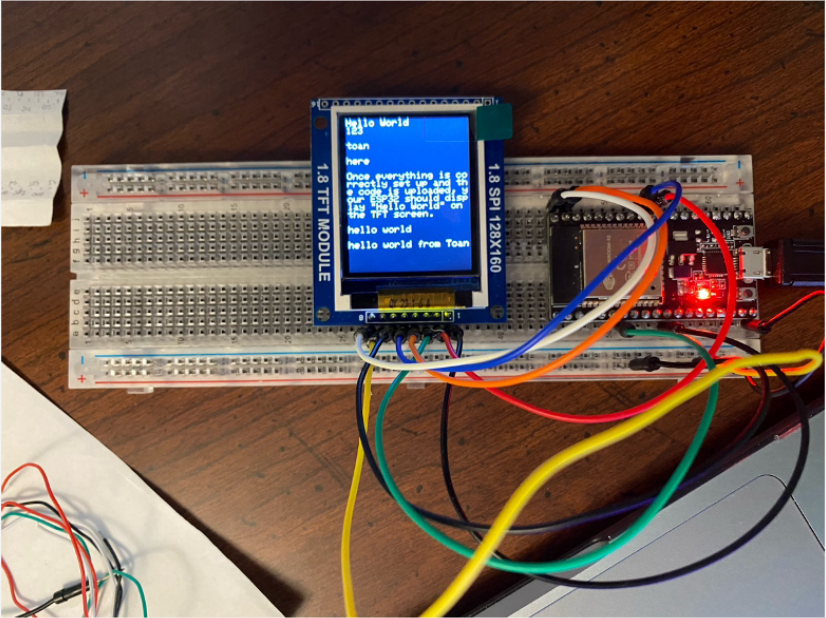
Project 5.1: One-way Data Communication - Message Display
Pin Connections
| LCD Pin | Description | To ESP32 Pin |
|---|---|---|
| RST | Reset | P27 |
| CS | Chip Select | P5 |
| D/C | Data/Cmd | P32 |
| DIN | MOSI Slave | P23 |
| CLK | Clock | P18 |
| VCC | Power | 5V |
| BL | Backlight | 5V |
| GND | Ground (0V) | GND |
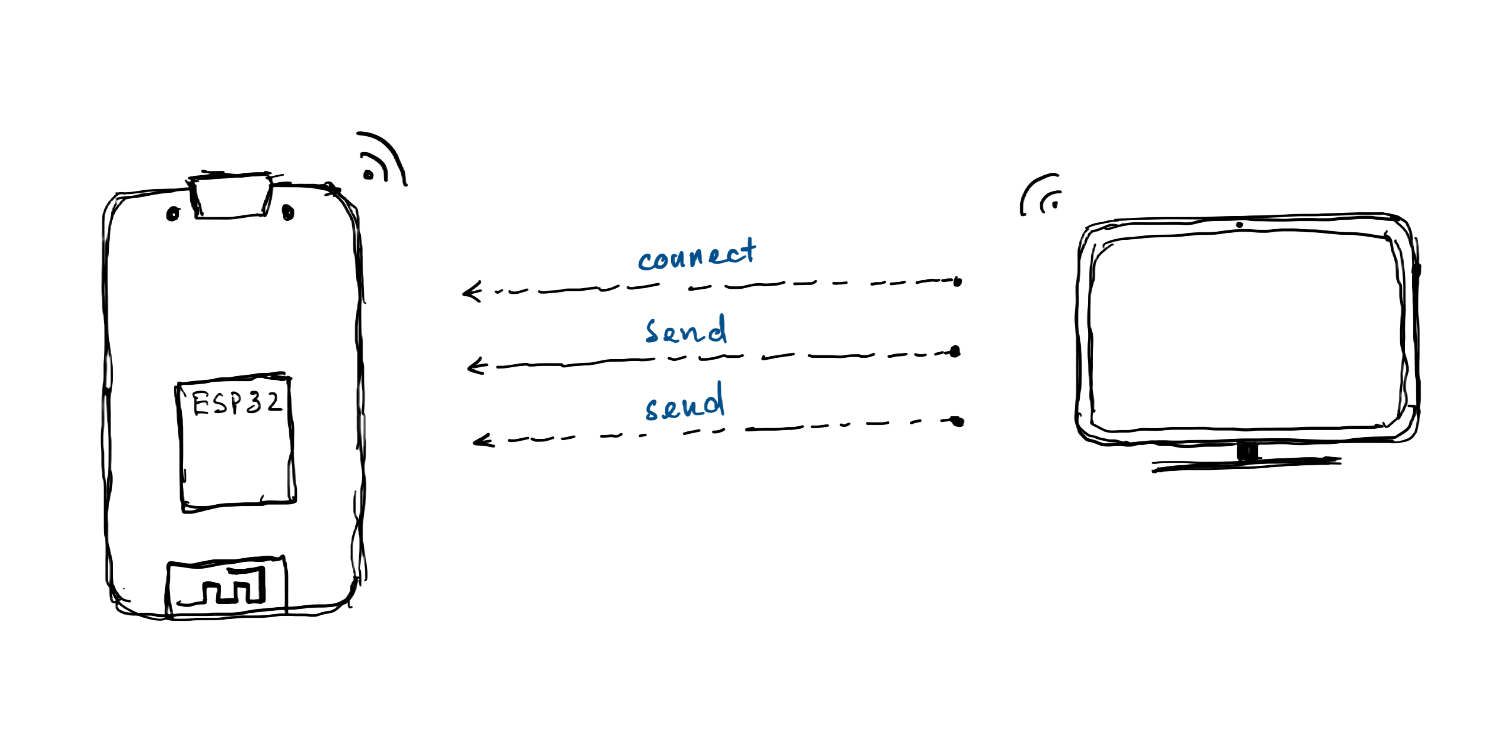
Network Diagram:
Pseudocode:
ESP32:
Include necessary libraries
Define pin connections for the TFT display
Create a TFT display object
Define WiFi credentials
Define UDP port and packet buffer

Function setup:
	Initialize the TFT display with specific settings
	Start serial communication for debugging
	Set up the ESP32 as a WiFi access point with the specified credentials
	Start the UDP service on the specified port
	Display the IP address and port on the TFT for 5 seconds
Function loop:
	Check if a UDP packet is available
	If a packet is available:
    	Read the packet into the buffer
    	Ensure the packet is a properly terminated string
    	Display the packet on the TFT display
Client:
Set BUF_LEN to 255
Declare is_running as boolean
Set PORT to 4210
Set IP_ADDRESS to "192.168.4.1"
Start
    Declare variables for socket, server address, and buffer
    Create UDP socket
    If socket creation fails Then Print an error message
    Configure server address with AF_INET, PORT, and IP address
    If conversion of IP address fails Then Print an error message
    Connect socket to server address
    If connection fails Then Print an error message
    Set is_running to true
    While is_running
    Read input from standard input into buffer
    If length of input > 0 Then
    Send buffer content to the server via socket
    If send fails Then
    Print an error message
    Else
    Print "message sent: " + buffer content
    EndIf
    If buffer starts with "quit" Then
    Set is_running to false
    EndIf
    Clear buffer
    EndIf
    EndWhile
Instructions:
- Visit this repo and download two files for this project (client file, project5_1.ino).
- In project5_1.ino, you can change the name and password of the access point. Afterward, upload the code into the ESP32. If you don’t have a battery for the ESP32, then you can use your computer as a power source for the ESP32.
- The IP address of the ESP32 should be there on the TFT screen, so note it down because this will be used as an address of your message to which you want to send
- In server.cpp, change IP_ADDRESS and PORT corresponding to the values displayed on the TFT screen. These are IP address and port number of our ESP32.
- Create a new terminal and go to the client file and run: 'make clean all'.
What you should see: