C Programming With Arduino for Beginners
Let’s start with a small and fun exercise to introduce ourselves to C programming and Arduino. Follow the diagram below to assemble your circuit.
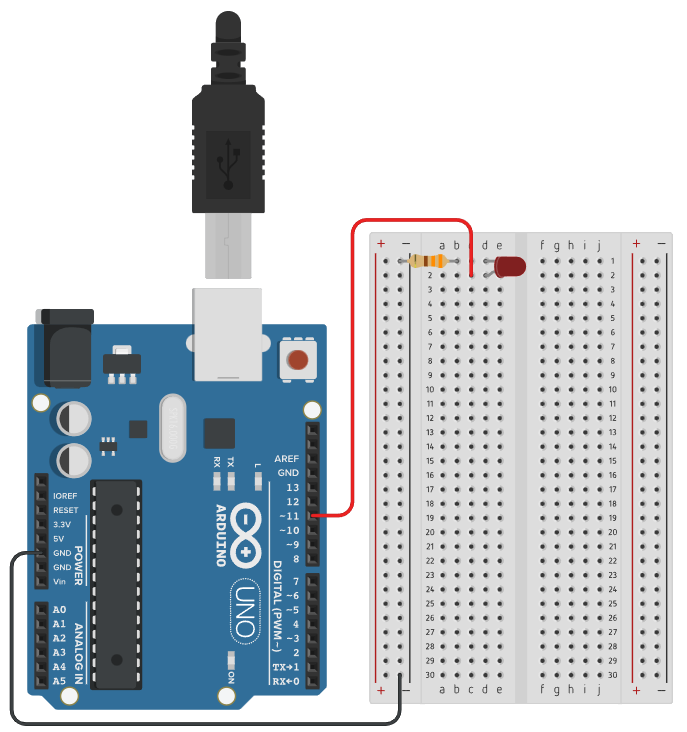
Once the circuit is assembled, copy the code below into the sketch. Then compile the sketch, click the “✔“, and upload, click the “→” at the top right corner.
void setup()
{
  pinMode(11, OUTPUT);
}

void loop()
{
  digitalWrite(11, HIGH);
  delay(1000);
  digitalWrite(11, LOW);
  delay(1000);
}
Code Explained:
void setup(){ //The code written in the setup() function will only be executed once

      pinMode(11, OUTPUT); //Tells the Arduino whether you want pin 11 to be an input or output
}

void loop(){ //The code written in the loop() function will be written until the power runs out

      digitalWrite(11, HIGH); //<--Since we are using pin 11 as an output, you can choose whether you want it HIGH=ON or LOW=OFF
      delay(1000); //<--This tells the Arduino and LED to do nothing and wait for 1000 milliseconds(1 second)

      digitalWrite(11, LOW);
      delay(1000);
}
Your Turn
Try changing the code so that it will create a blinking pattern, also known as morse code. Search up on Google how to write your name in morse code and change the code so that the LED will spell out your name. (HINT: change the number in delay().)
(Eg: Cat in morse code is: ー • ー • • ー ー)
A circle, “ • ” would mean the light will be on for a short time (1-2 seconds) whereas the lines “ ー “ would be on for a longer time (4-5 seconds).
Chapter 1: Variables and Constants
What is a Variable?
A data item whose value can be changed throughout the program.
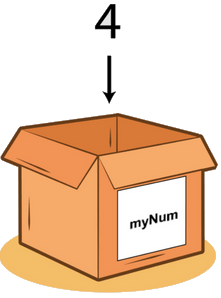
- Imagine when you are moving there would be many boxes with different things in them. These boxes are labelled so that it is easier to find things. Variables are similar, they are labelled boxes that store important values.
- The value of a variable can be changed at any time by typing the variable again.
- Assigning a name to a variable makes it easier to read and track the memory location of data.
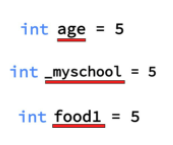
Rules for naming variables:
- Variable names can only contain letters (uppercase and lowercase), numbers and underscores. No special characters.
- The first character of your variable should be a letter or an underscore. Try not to start with an underscore as some c built-in variables start with an underscore.
- The variable name should typically be between 1-31 characters
These are examples of some words that cannot be used as variable names as they are special words used in C programming.


Declaring a Variable
To declare a variable:
int myAge = 16
↑ ↑ ↑
Variable type Variable name Value Variable types will be discussed in the next lesson. For the following exercise use int and only use whole numbers like 1, 2, 89 and 24.
Constant
A data item whose value cannot be modified or changed once defined. Constant can be thought of as a closed box, once you put an object in it cannot be changed. Their value remains constant throughout the entire program. The keyword ‘const’ is used to make a value constant.
(Eg: const double age = 4)
Declaring a Constant
Similar to declaring a variable, add “const” in front.
const int myAge = 5
↑ ↑ ↑ ↑
const keyword Variable type Variable name Value
QUICK CHECK
Try to identify whether or not these variable names are acceptable:
- 1522Age
- c, programming
- my#$age
Number 2 and 3 are wrong as they have special characters like #, $ and a white space “ “.
To review what you learned answer the following questions:
- What is the difference between a variable and a constant?
- What are the rules for naming a variable?
- How do you declare a variable?
Let’s try declaring a variable using the serial monitor.
Open up your Arduino Software IDE. Visit arduino.cc/guide if you need help downloading it. (adding “//” in front of a sentence tells the Arduino that the following sentence is a comment, where it is used to write down notes)
int myAge = 16;
void setup(){
      Serial.begin(9600); //this allows the Arduino to send commands through the USB connection.
      //9600 is called the "baud rate" which is how fast the data is being sent
      Serial.println(myAge); //this prints the value of myAge in the serial monitor
}
void loop(){
      //leave this section empty for now. Once you are done compiling and verifying your code
}
The code above should print out
16
To redefine a variable, write int myAge = (new value) at the beginning of void setup.
int myAge = 16;
void setup(){
      int myAge = 21;
      Serial.begin(9600);
      Serial.println(myAge);
}
void loop(){

}
The output shown in the serial monitor will be the new value, 21.
!!YOUR TURN!!
- Try adding multiple variables to see what the output will be.
- What would happen if you add Serial.println() in the void loop () section?
- Try adding const in front of your variable. What do you notice when you try to redefine the variable?