Windmill Assembly Guide
How To Assemble Your Windmill
Step 1: To begin, you will need to assemble the base structure of your wind turbine using the PVC tubes and connectors. Be creative!
Step 2: Follow the Gearbox Kit Assembly Instructions below.
Step 3: Now screw the windhub onto the drive shaft.
Step 4: Design your vanes and attach onto the windhub.
Gearbox Kit Assembly Instructions
For the purpose of this competition, only the parts shown from the provided gearbox kit will be used in the build of your wind turbines. Please follow these instructions carefully. The extra parts that are not used can be placed back in the packaging.
Step 1: Attaching The Motor
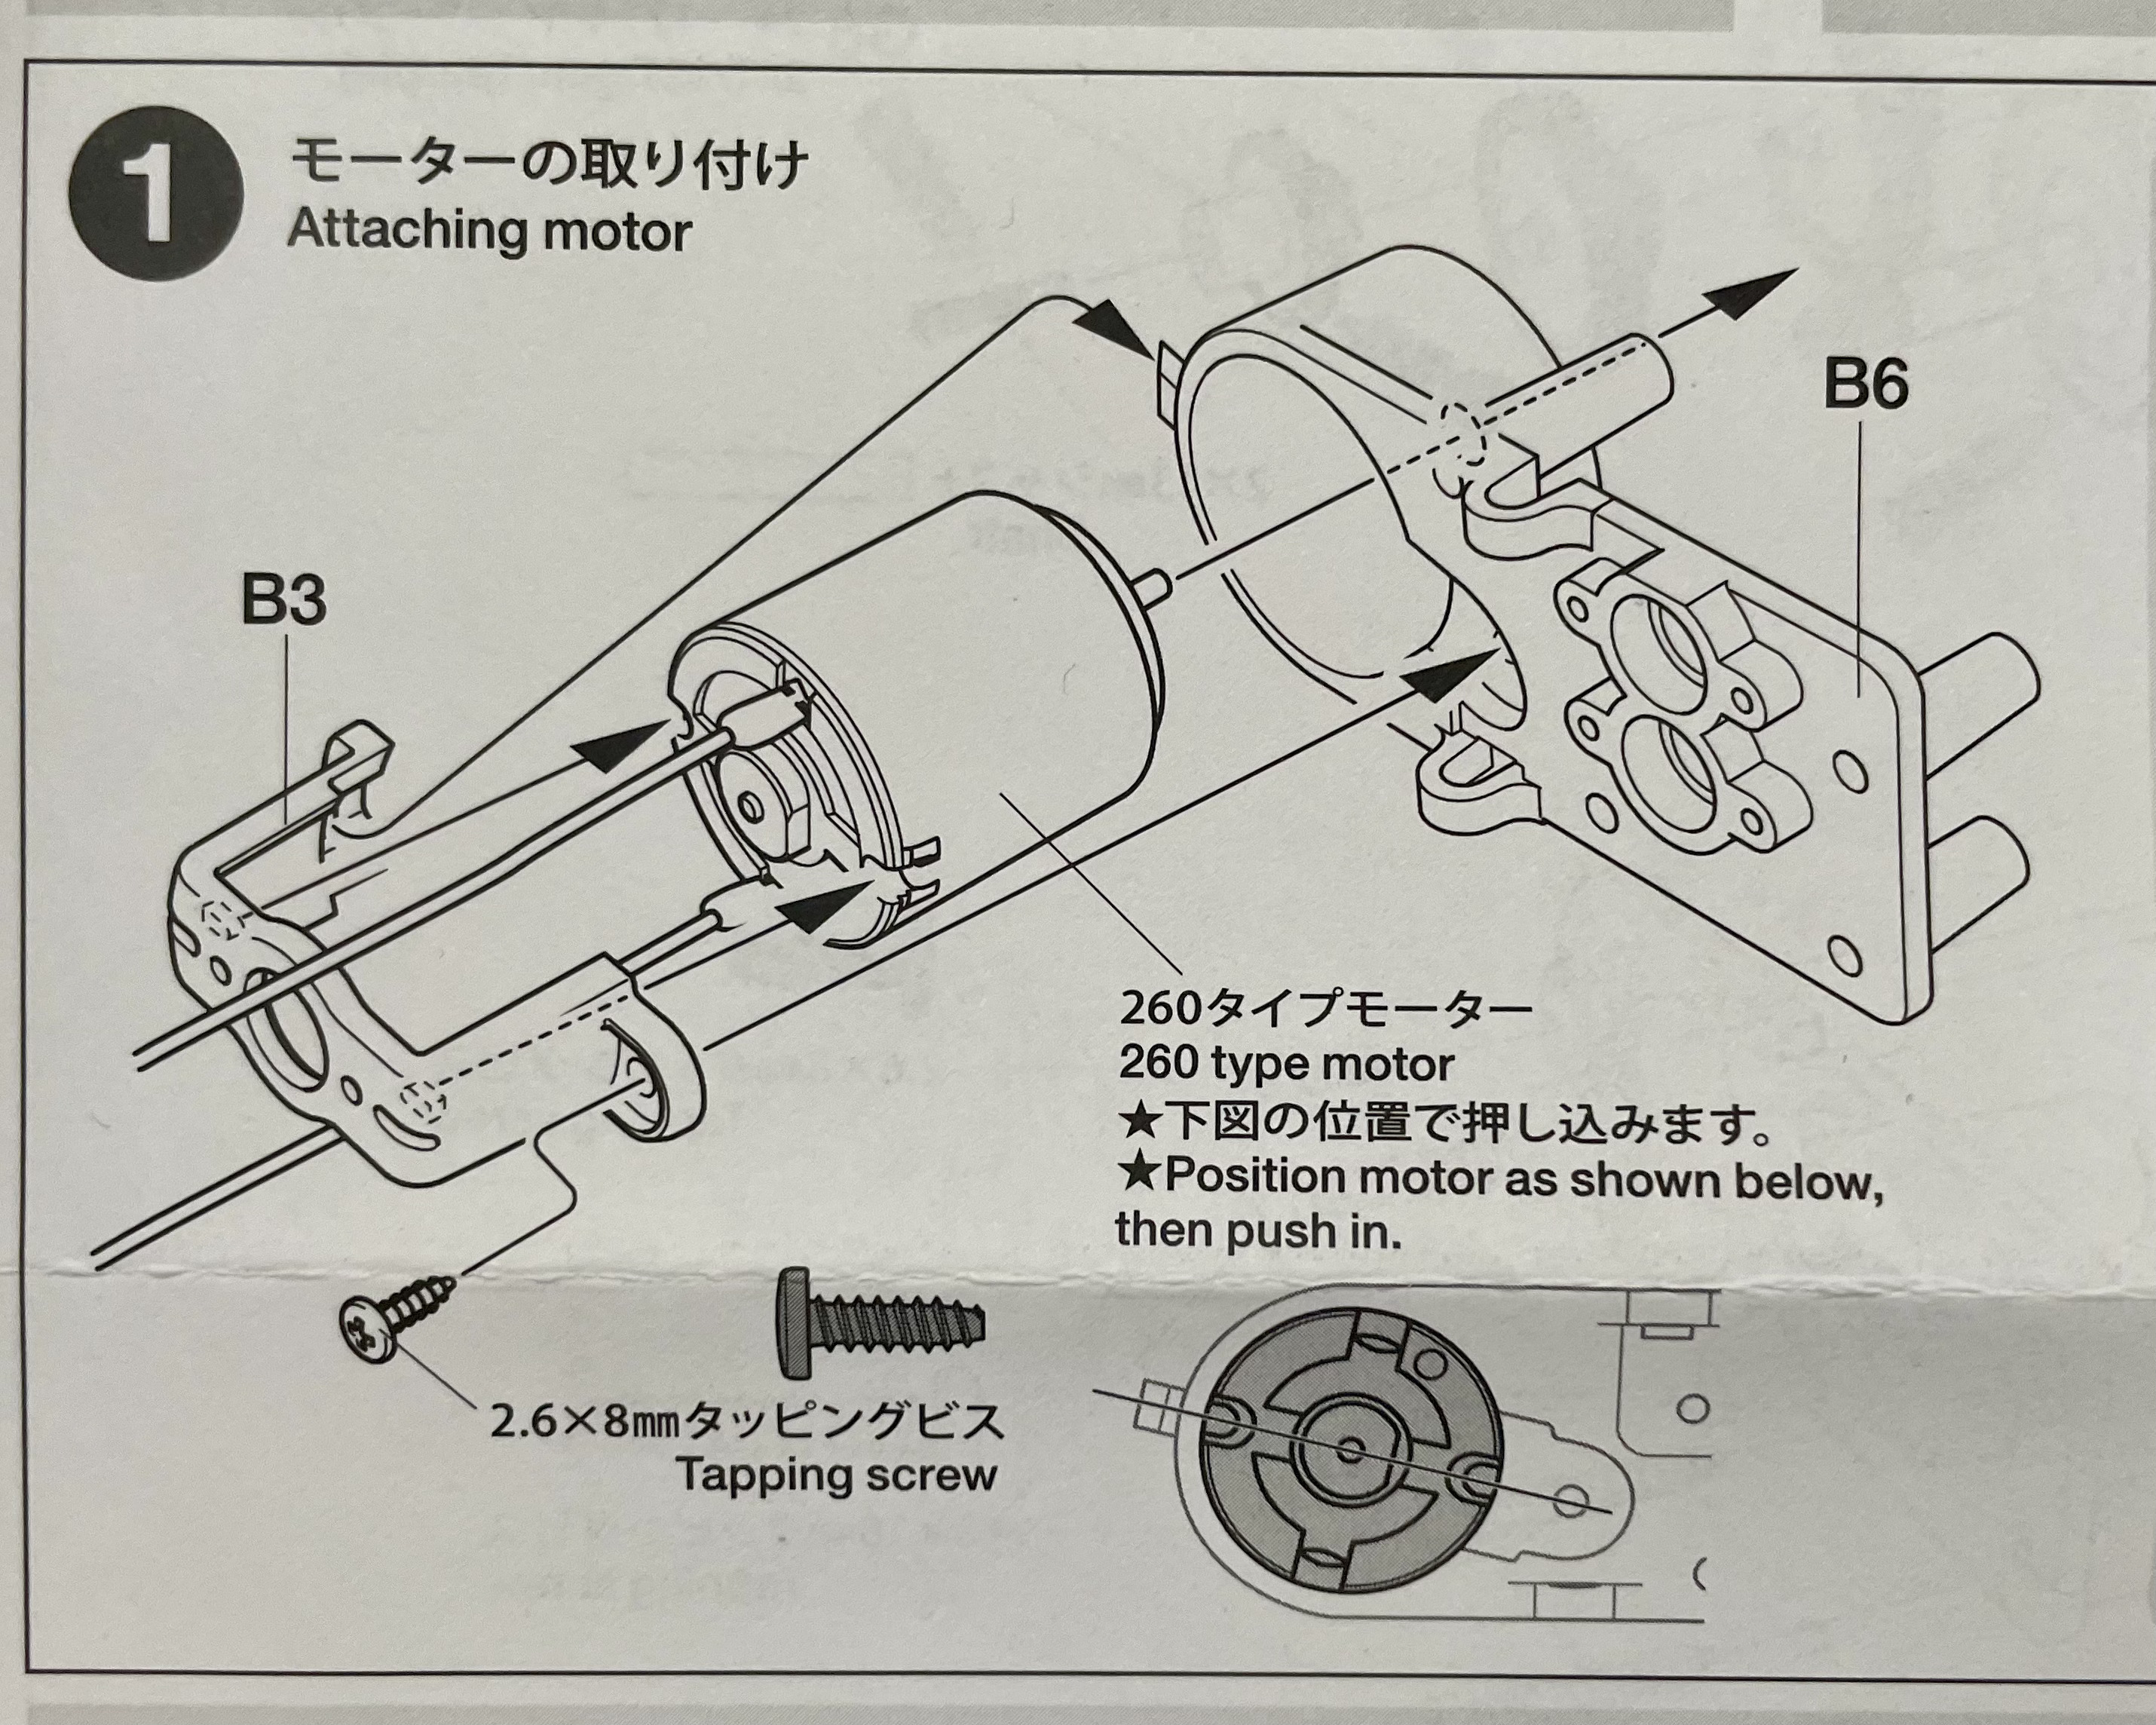
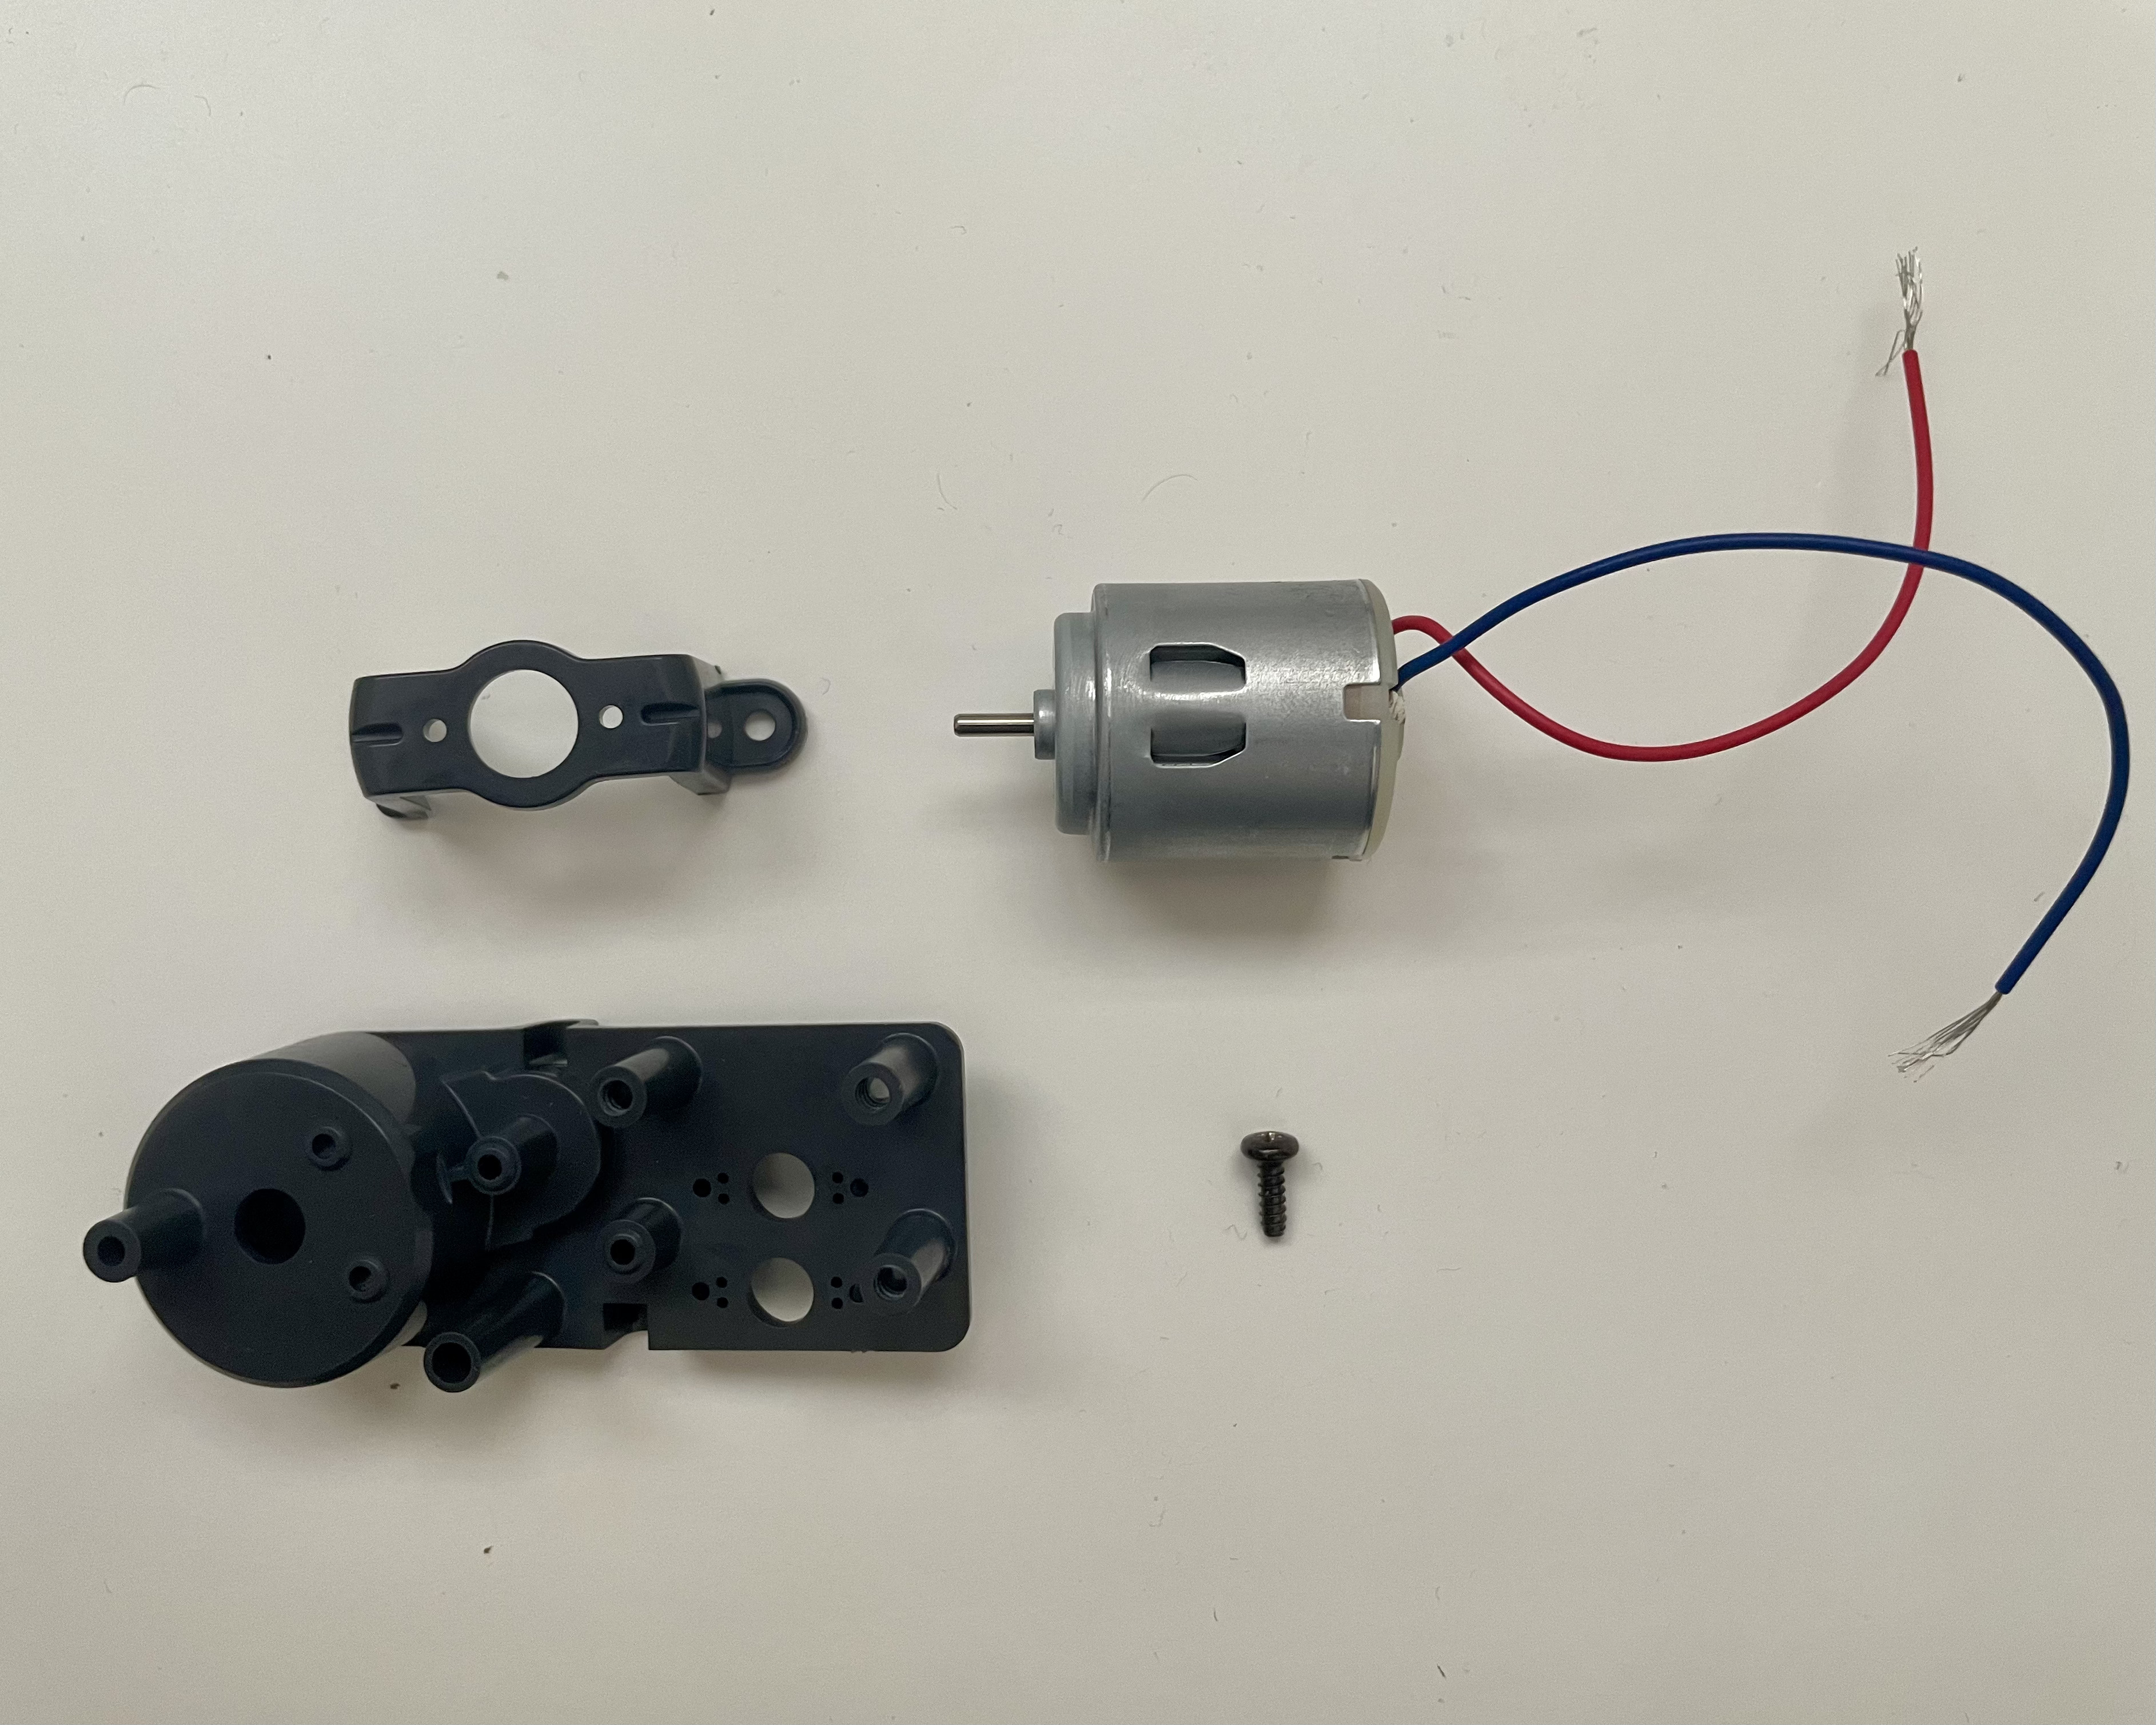
Parts Required for Step 1
- B3
- B6
- 2.6x8mm Tapping Screw
- 260 Type Motor (comes with the kit)
- Position and insert motor into B6 as shown below.
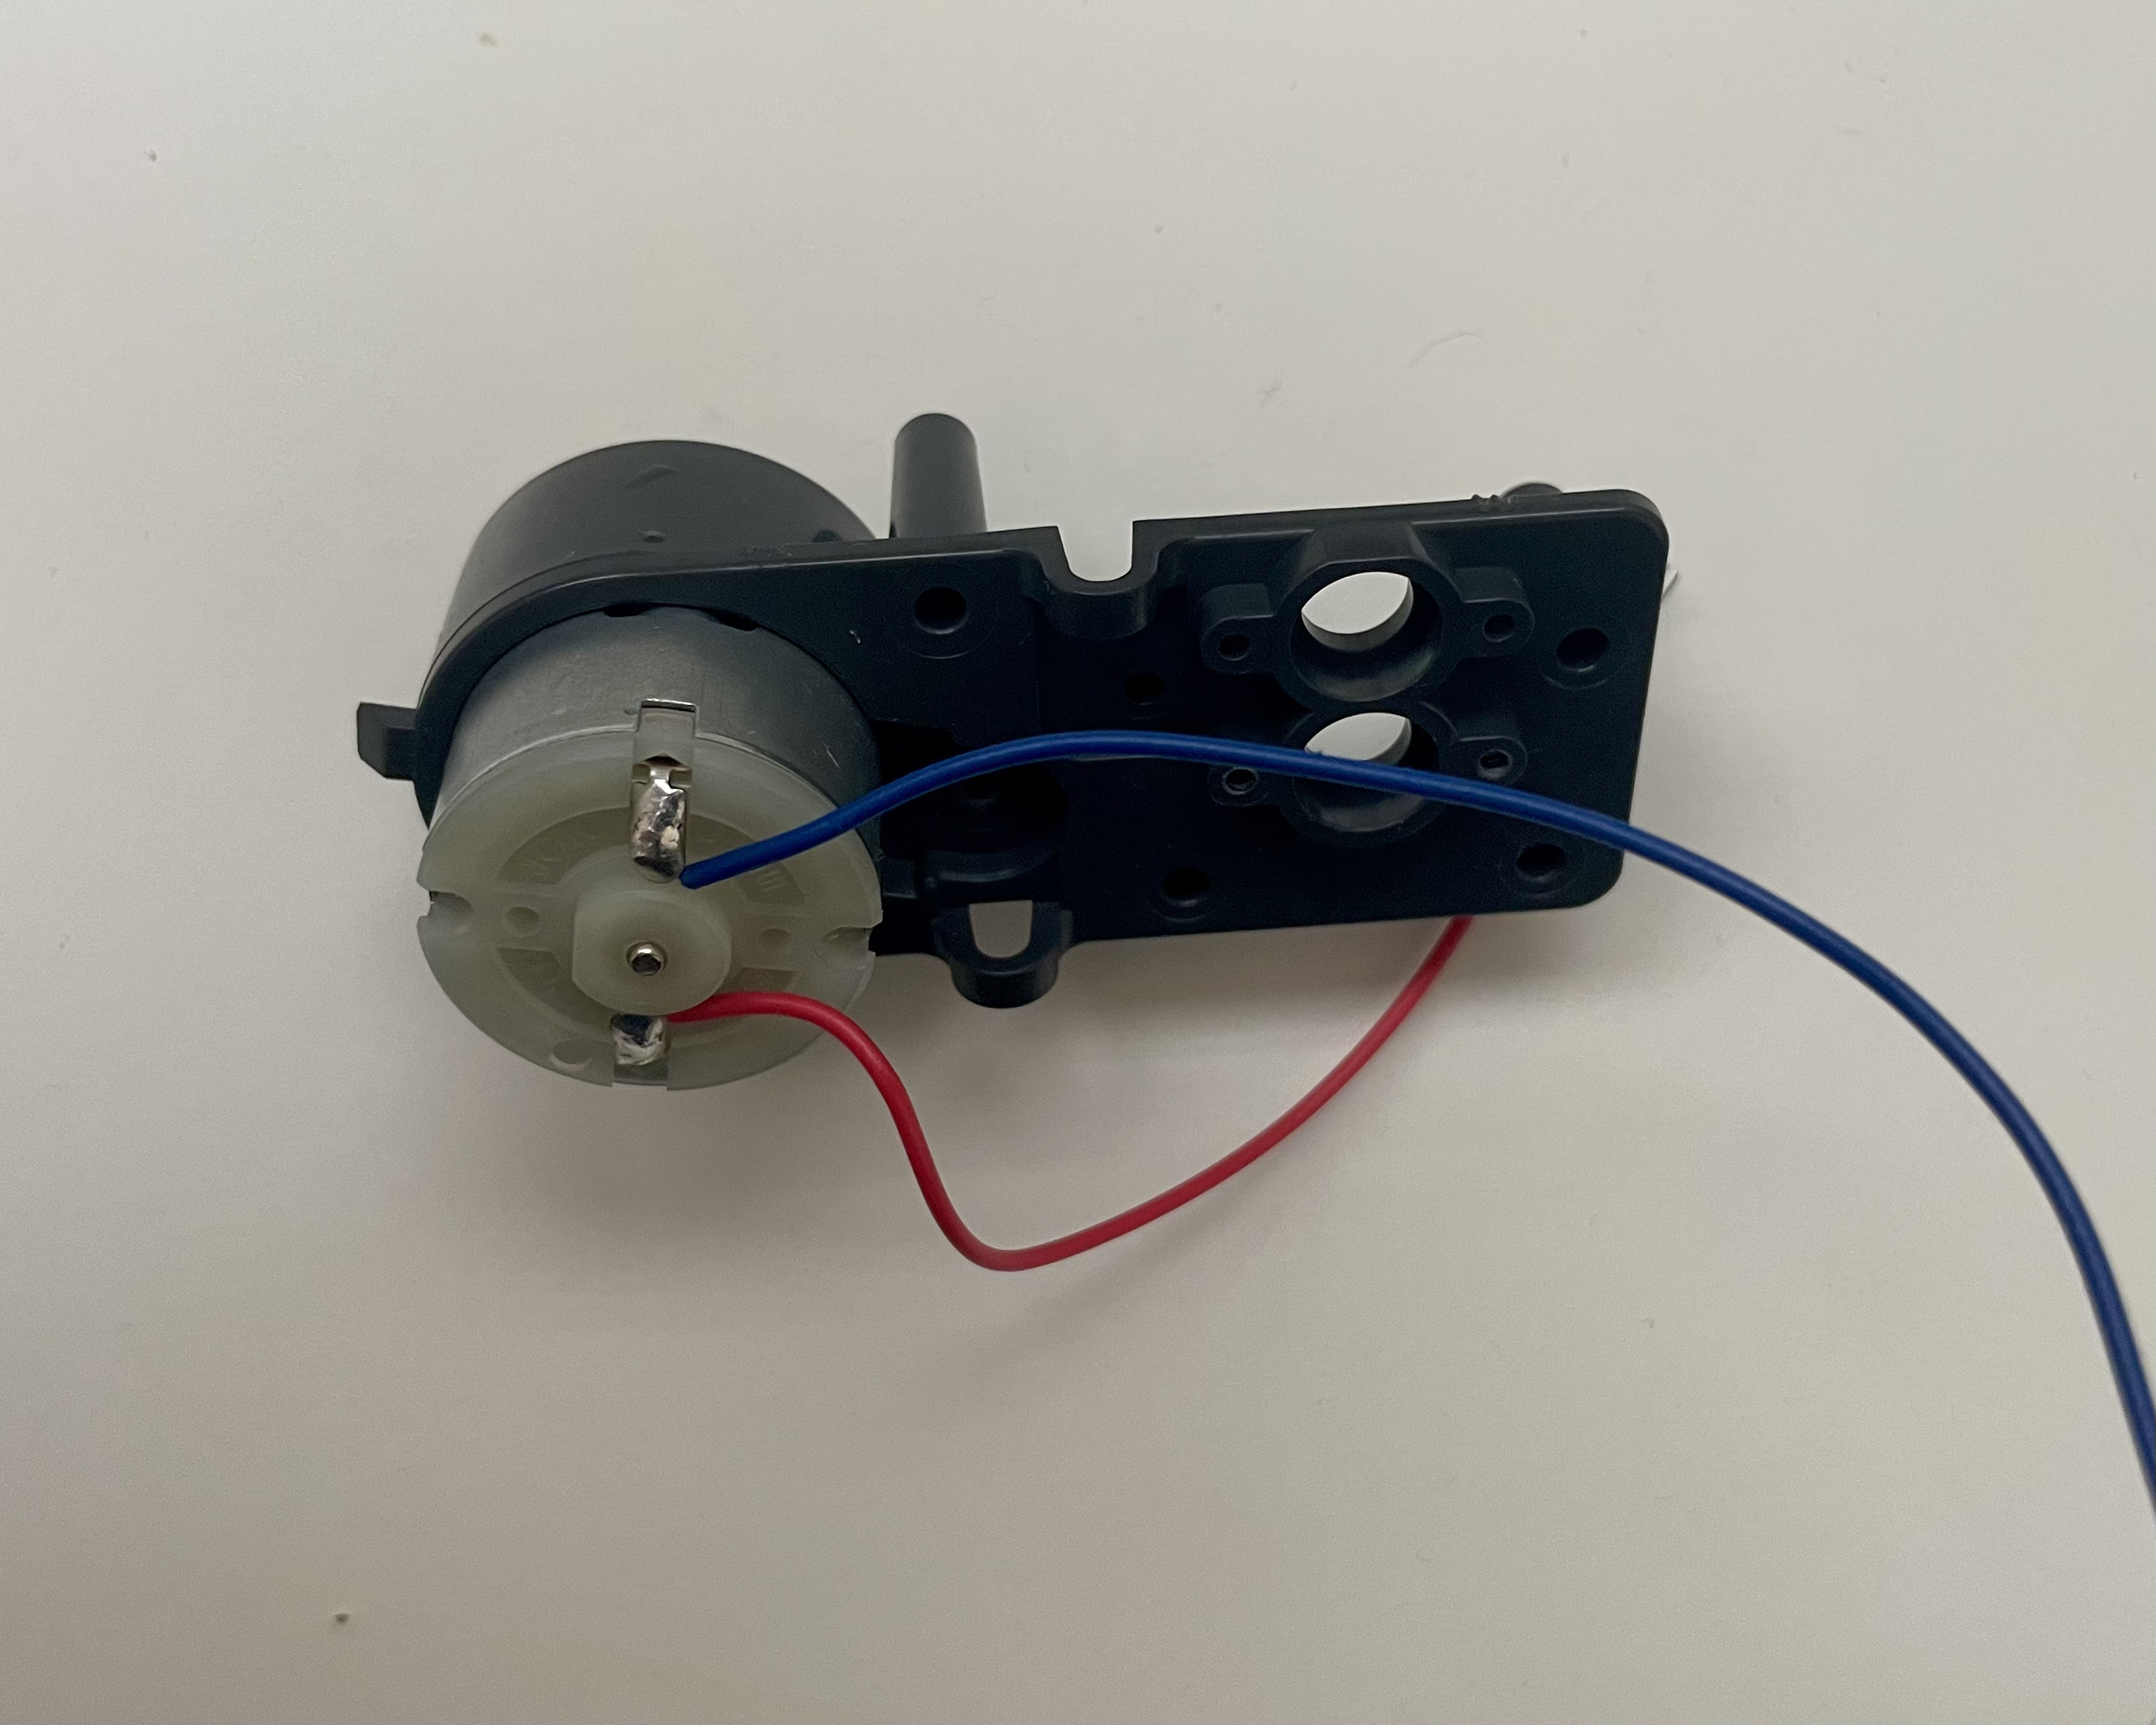
- Snap B3 into the clip on B6 and screw the 2.6x8mm dark colored screw in (hand tight).
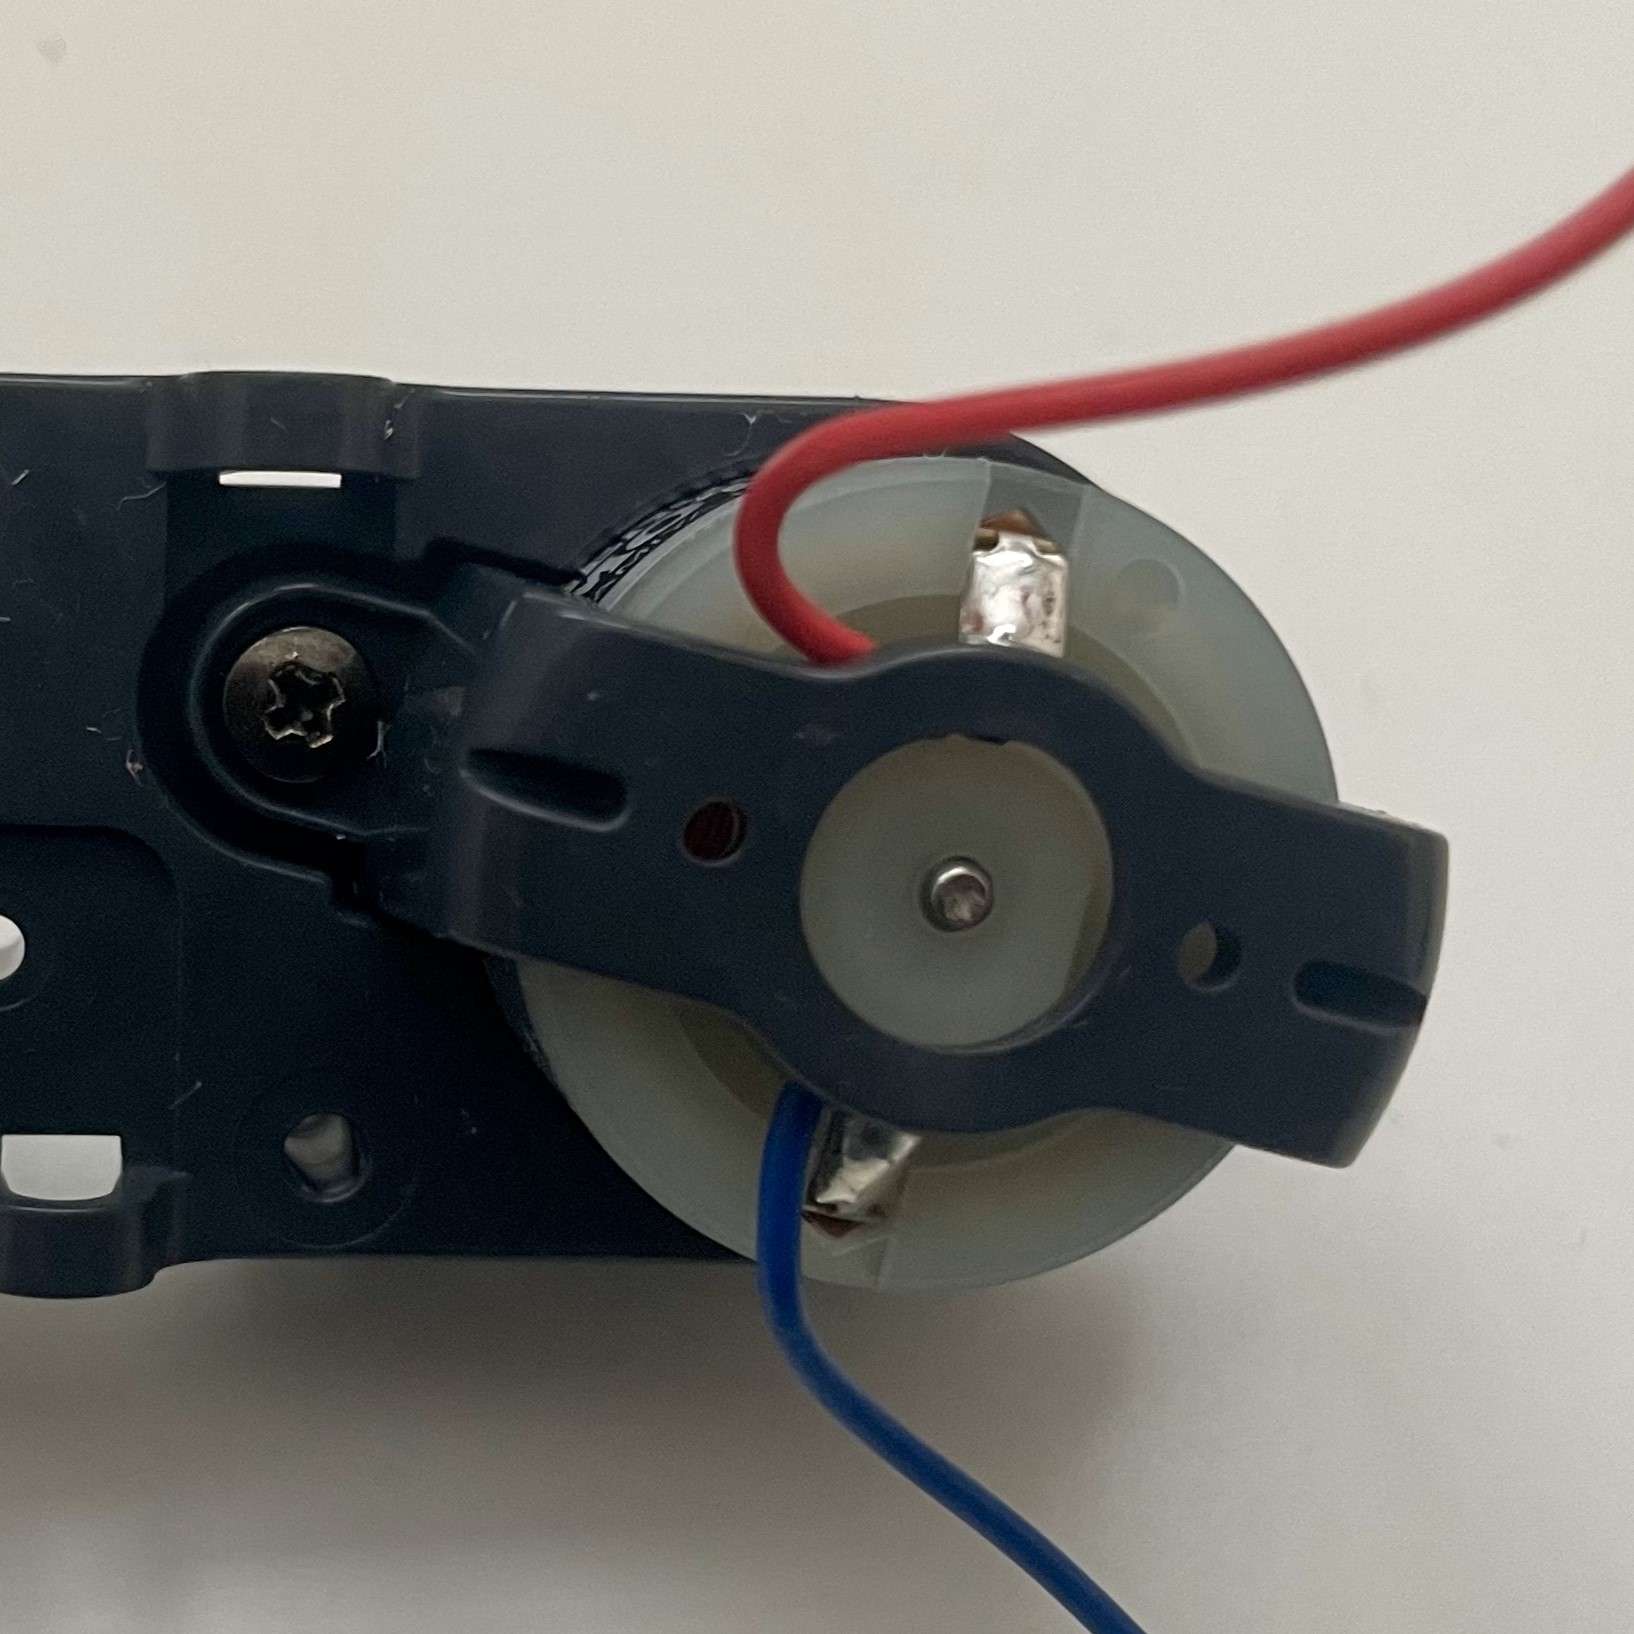
Step 2: Attaching Bearing Stoppers
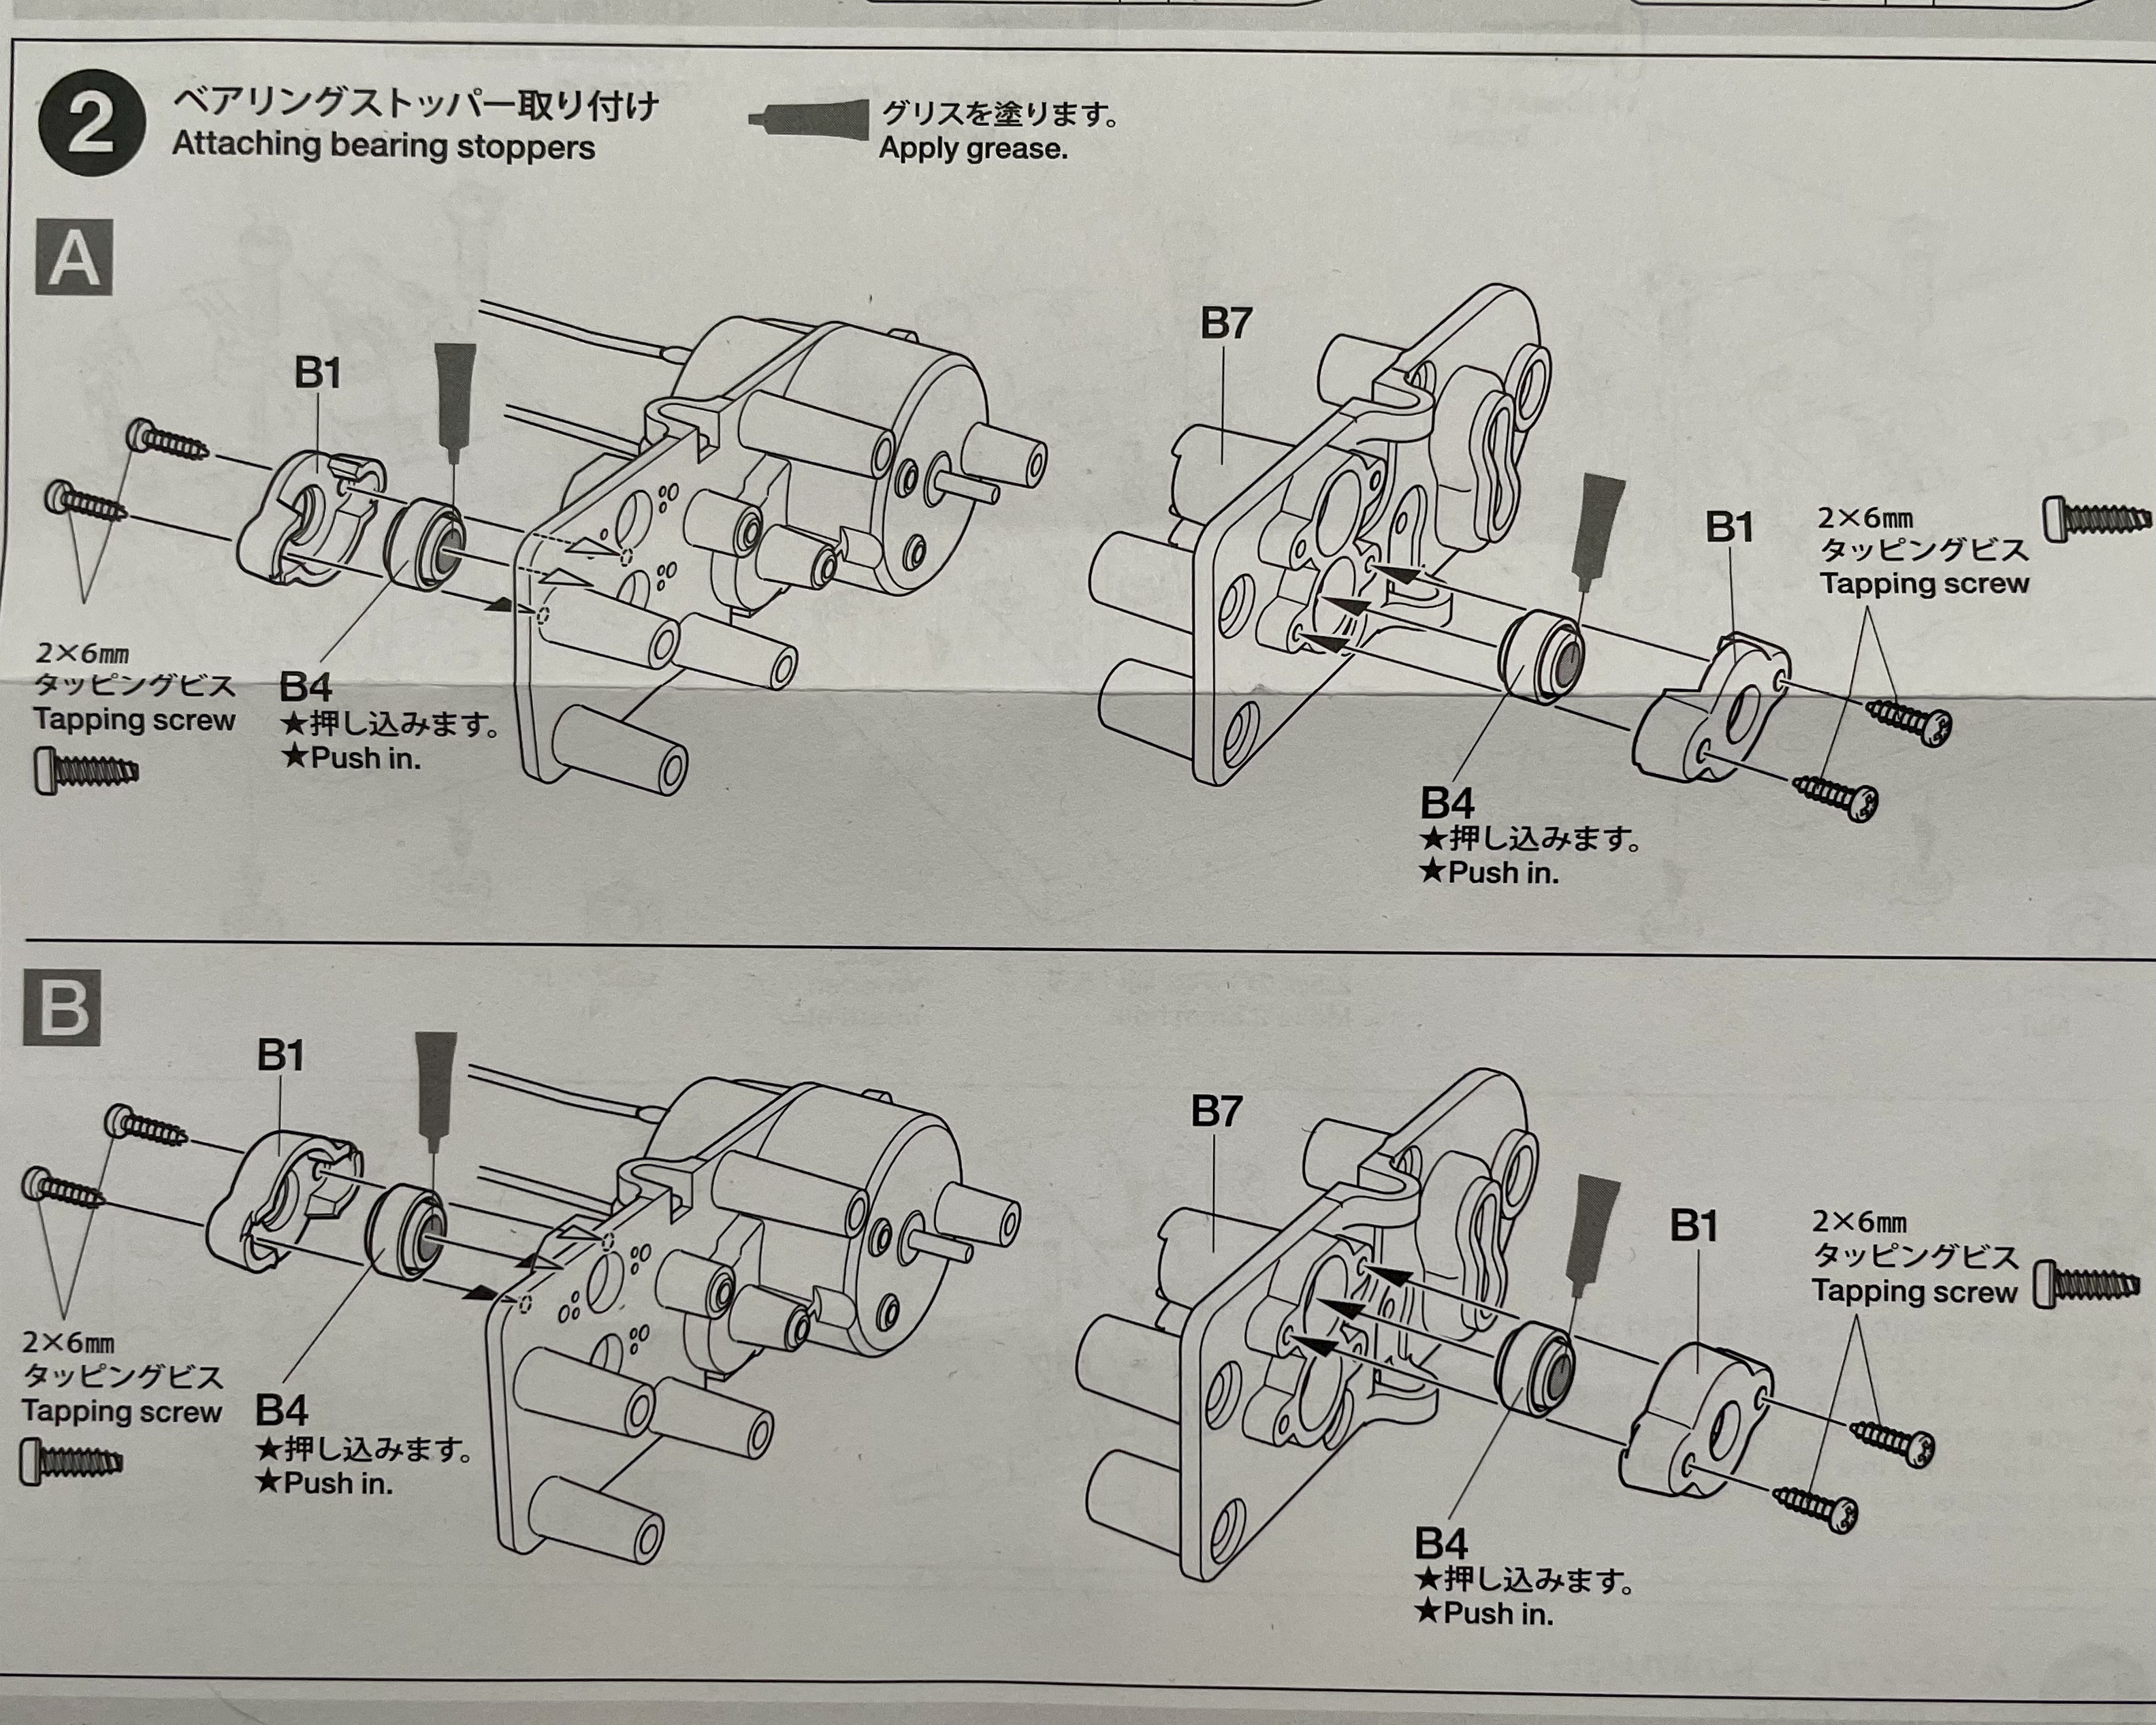
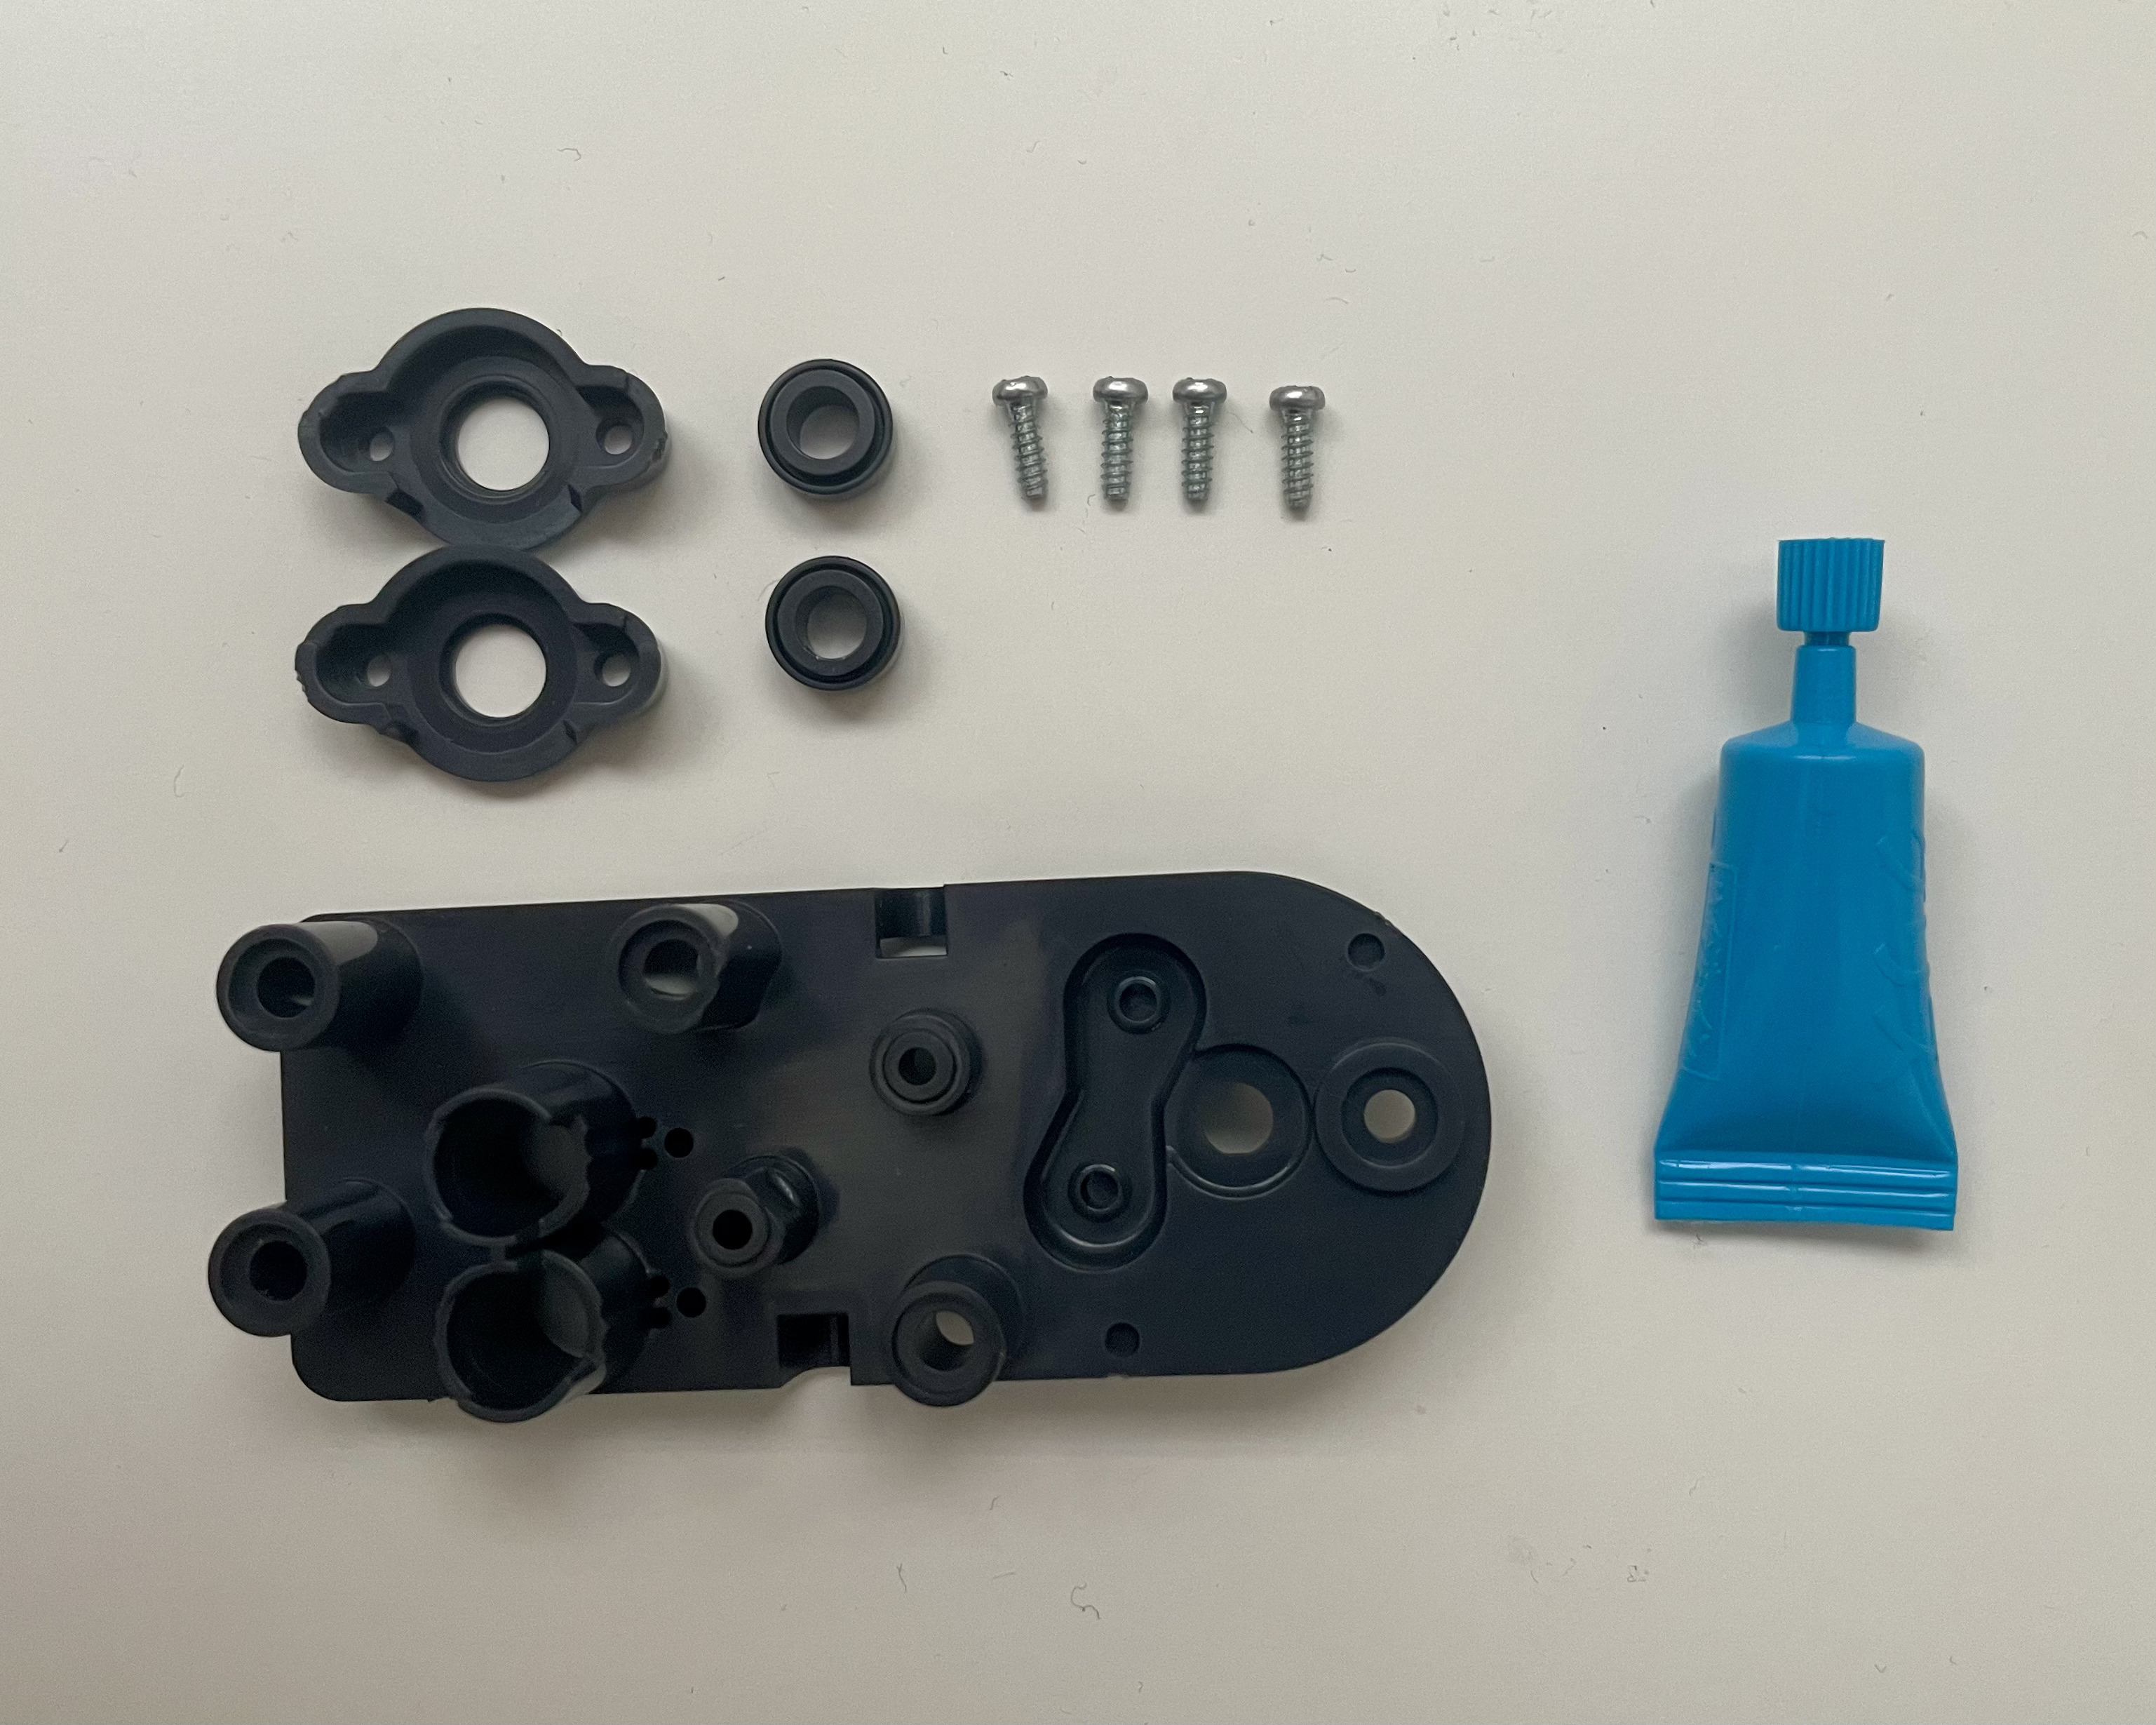
Parts Required for Step 2
- B1
- B4
- B7
- 2x6mm Tapping Screw
- Grease
- Place the bearing B4 into part B6 holding the motor as shown below. Apply grease in the bearing. (Bottom left hole in the picture)
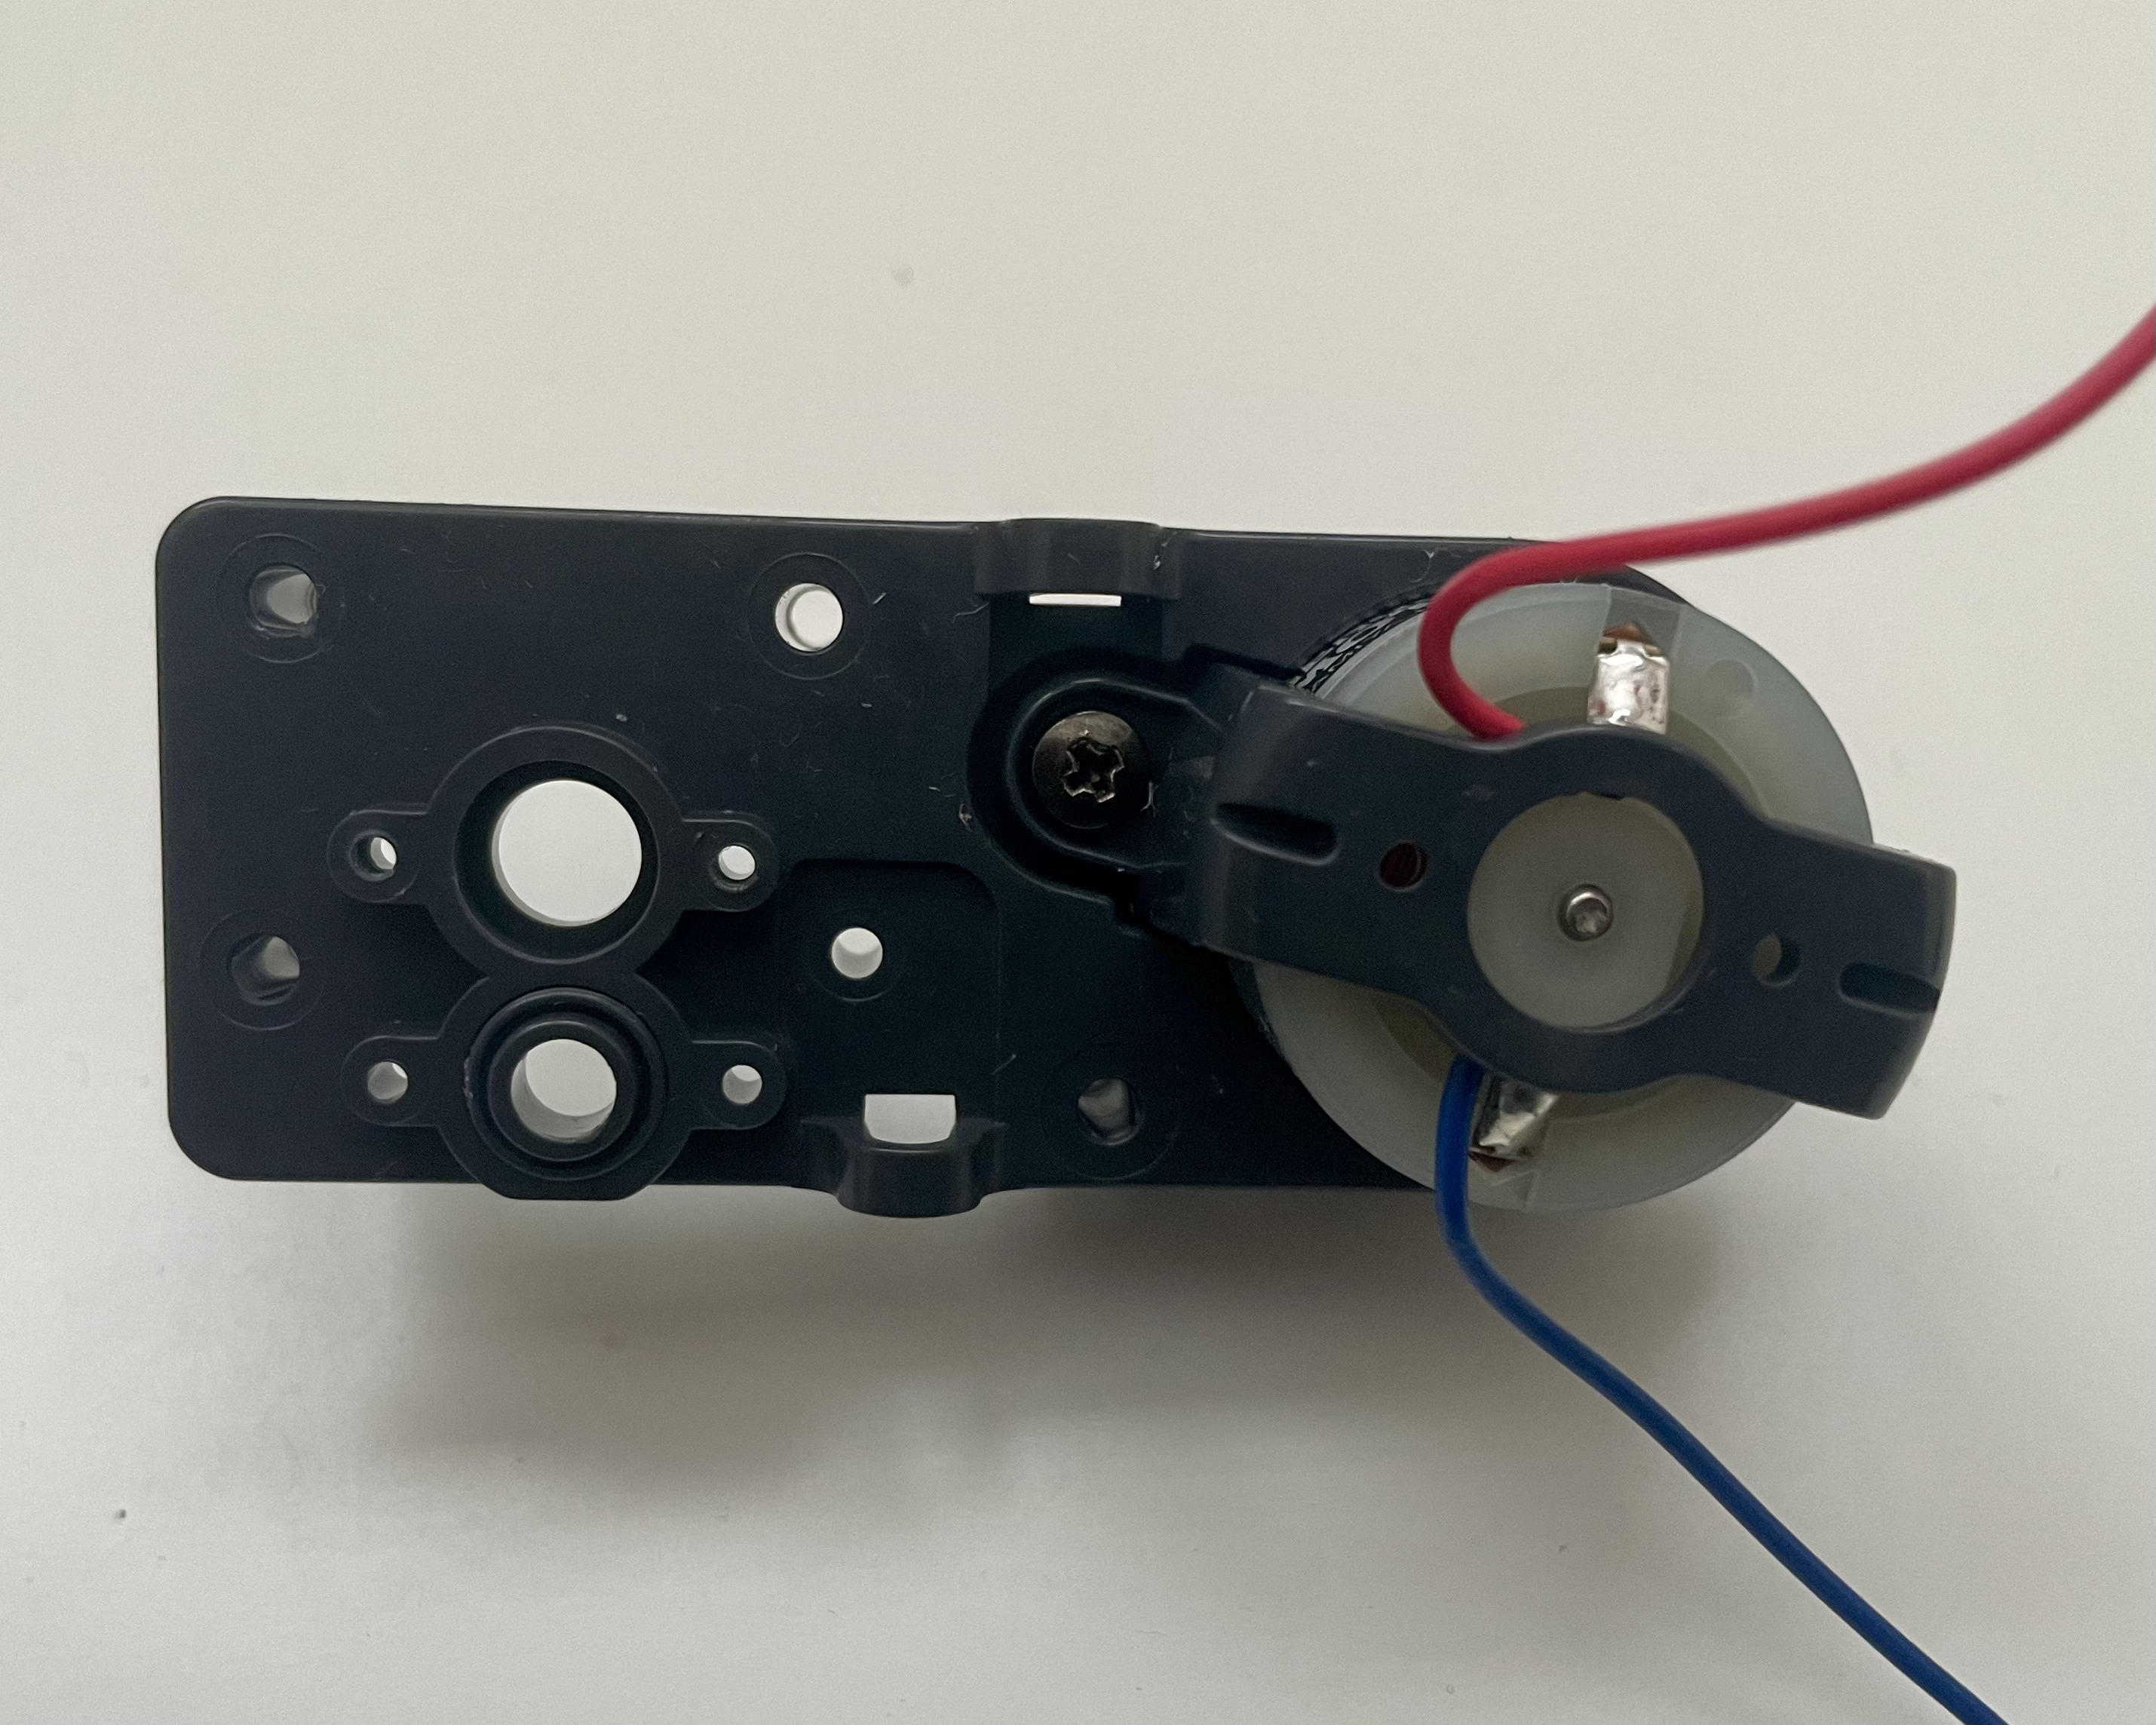
- Screw in part B1 using the tiny screws to secure it
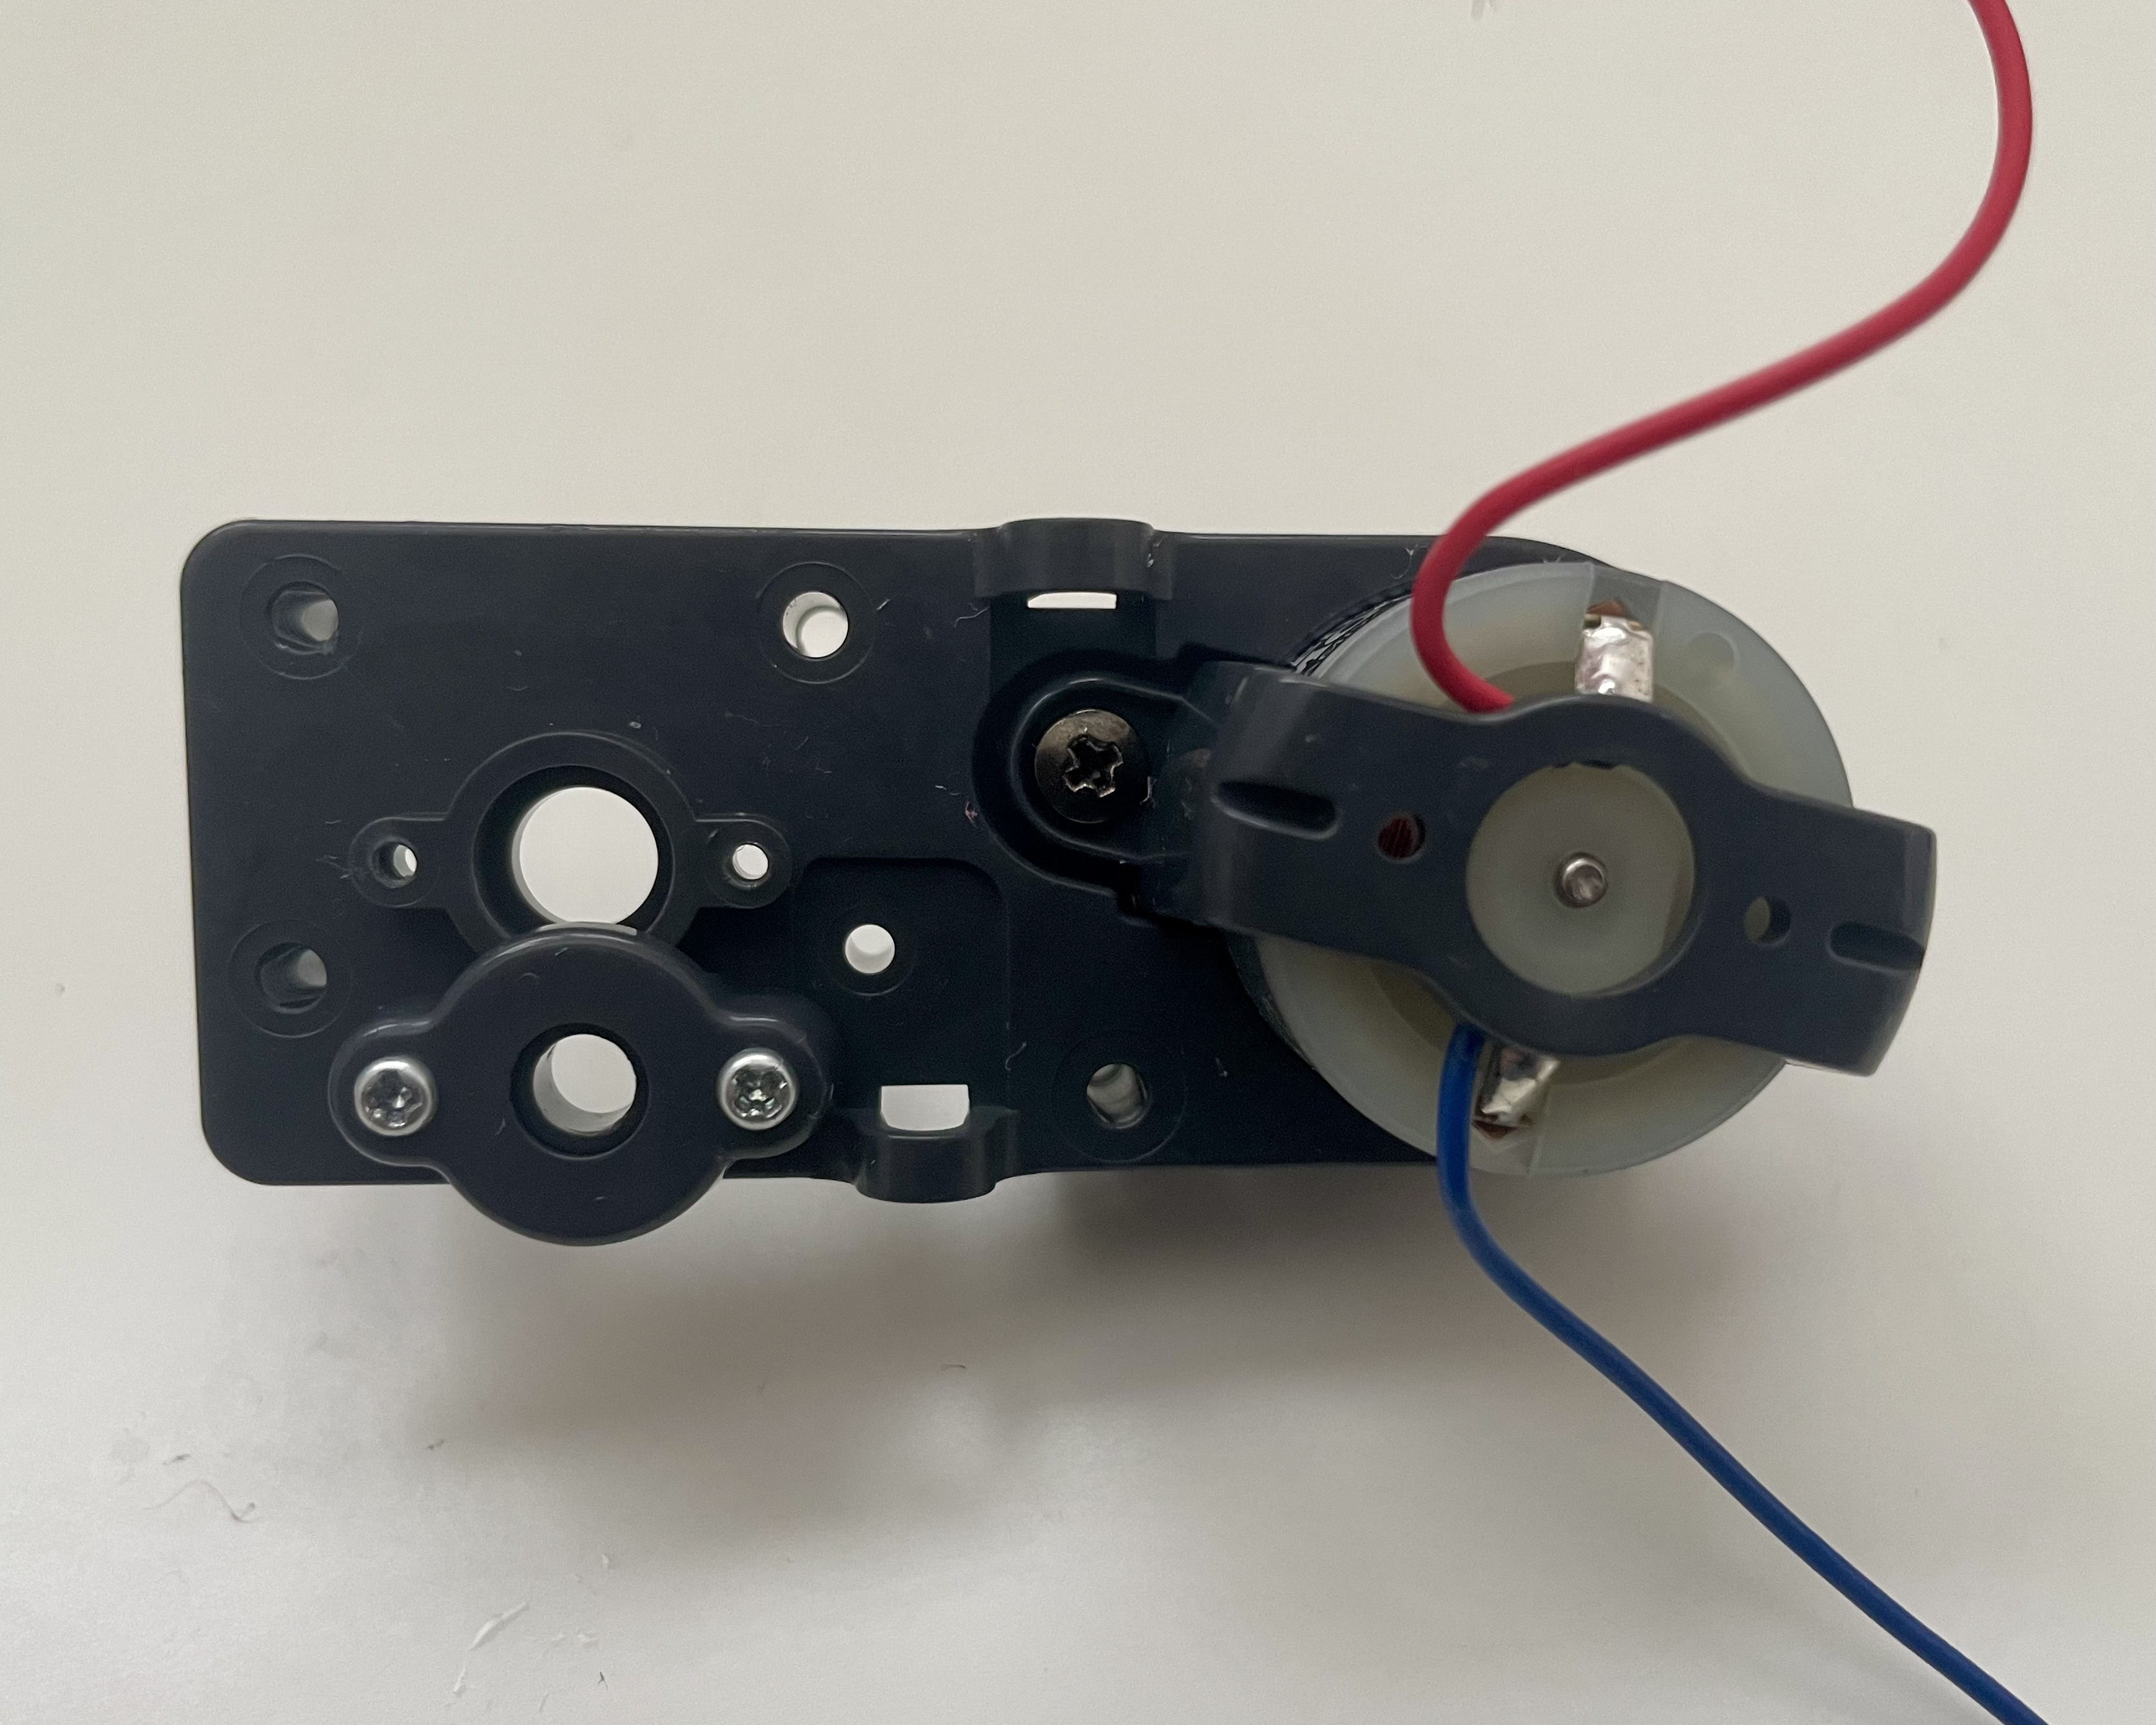
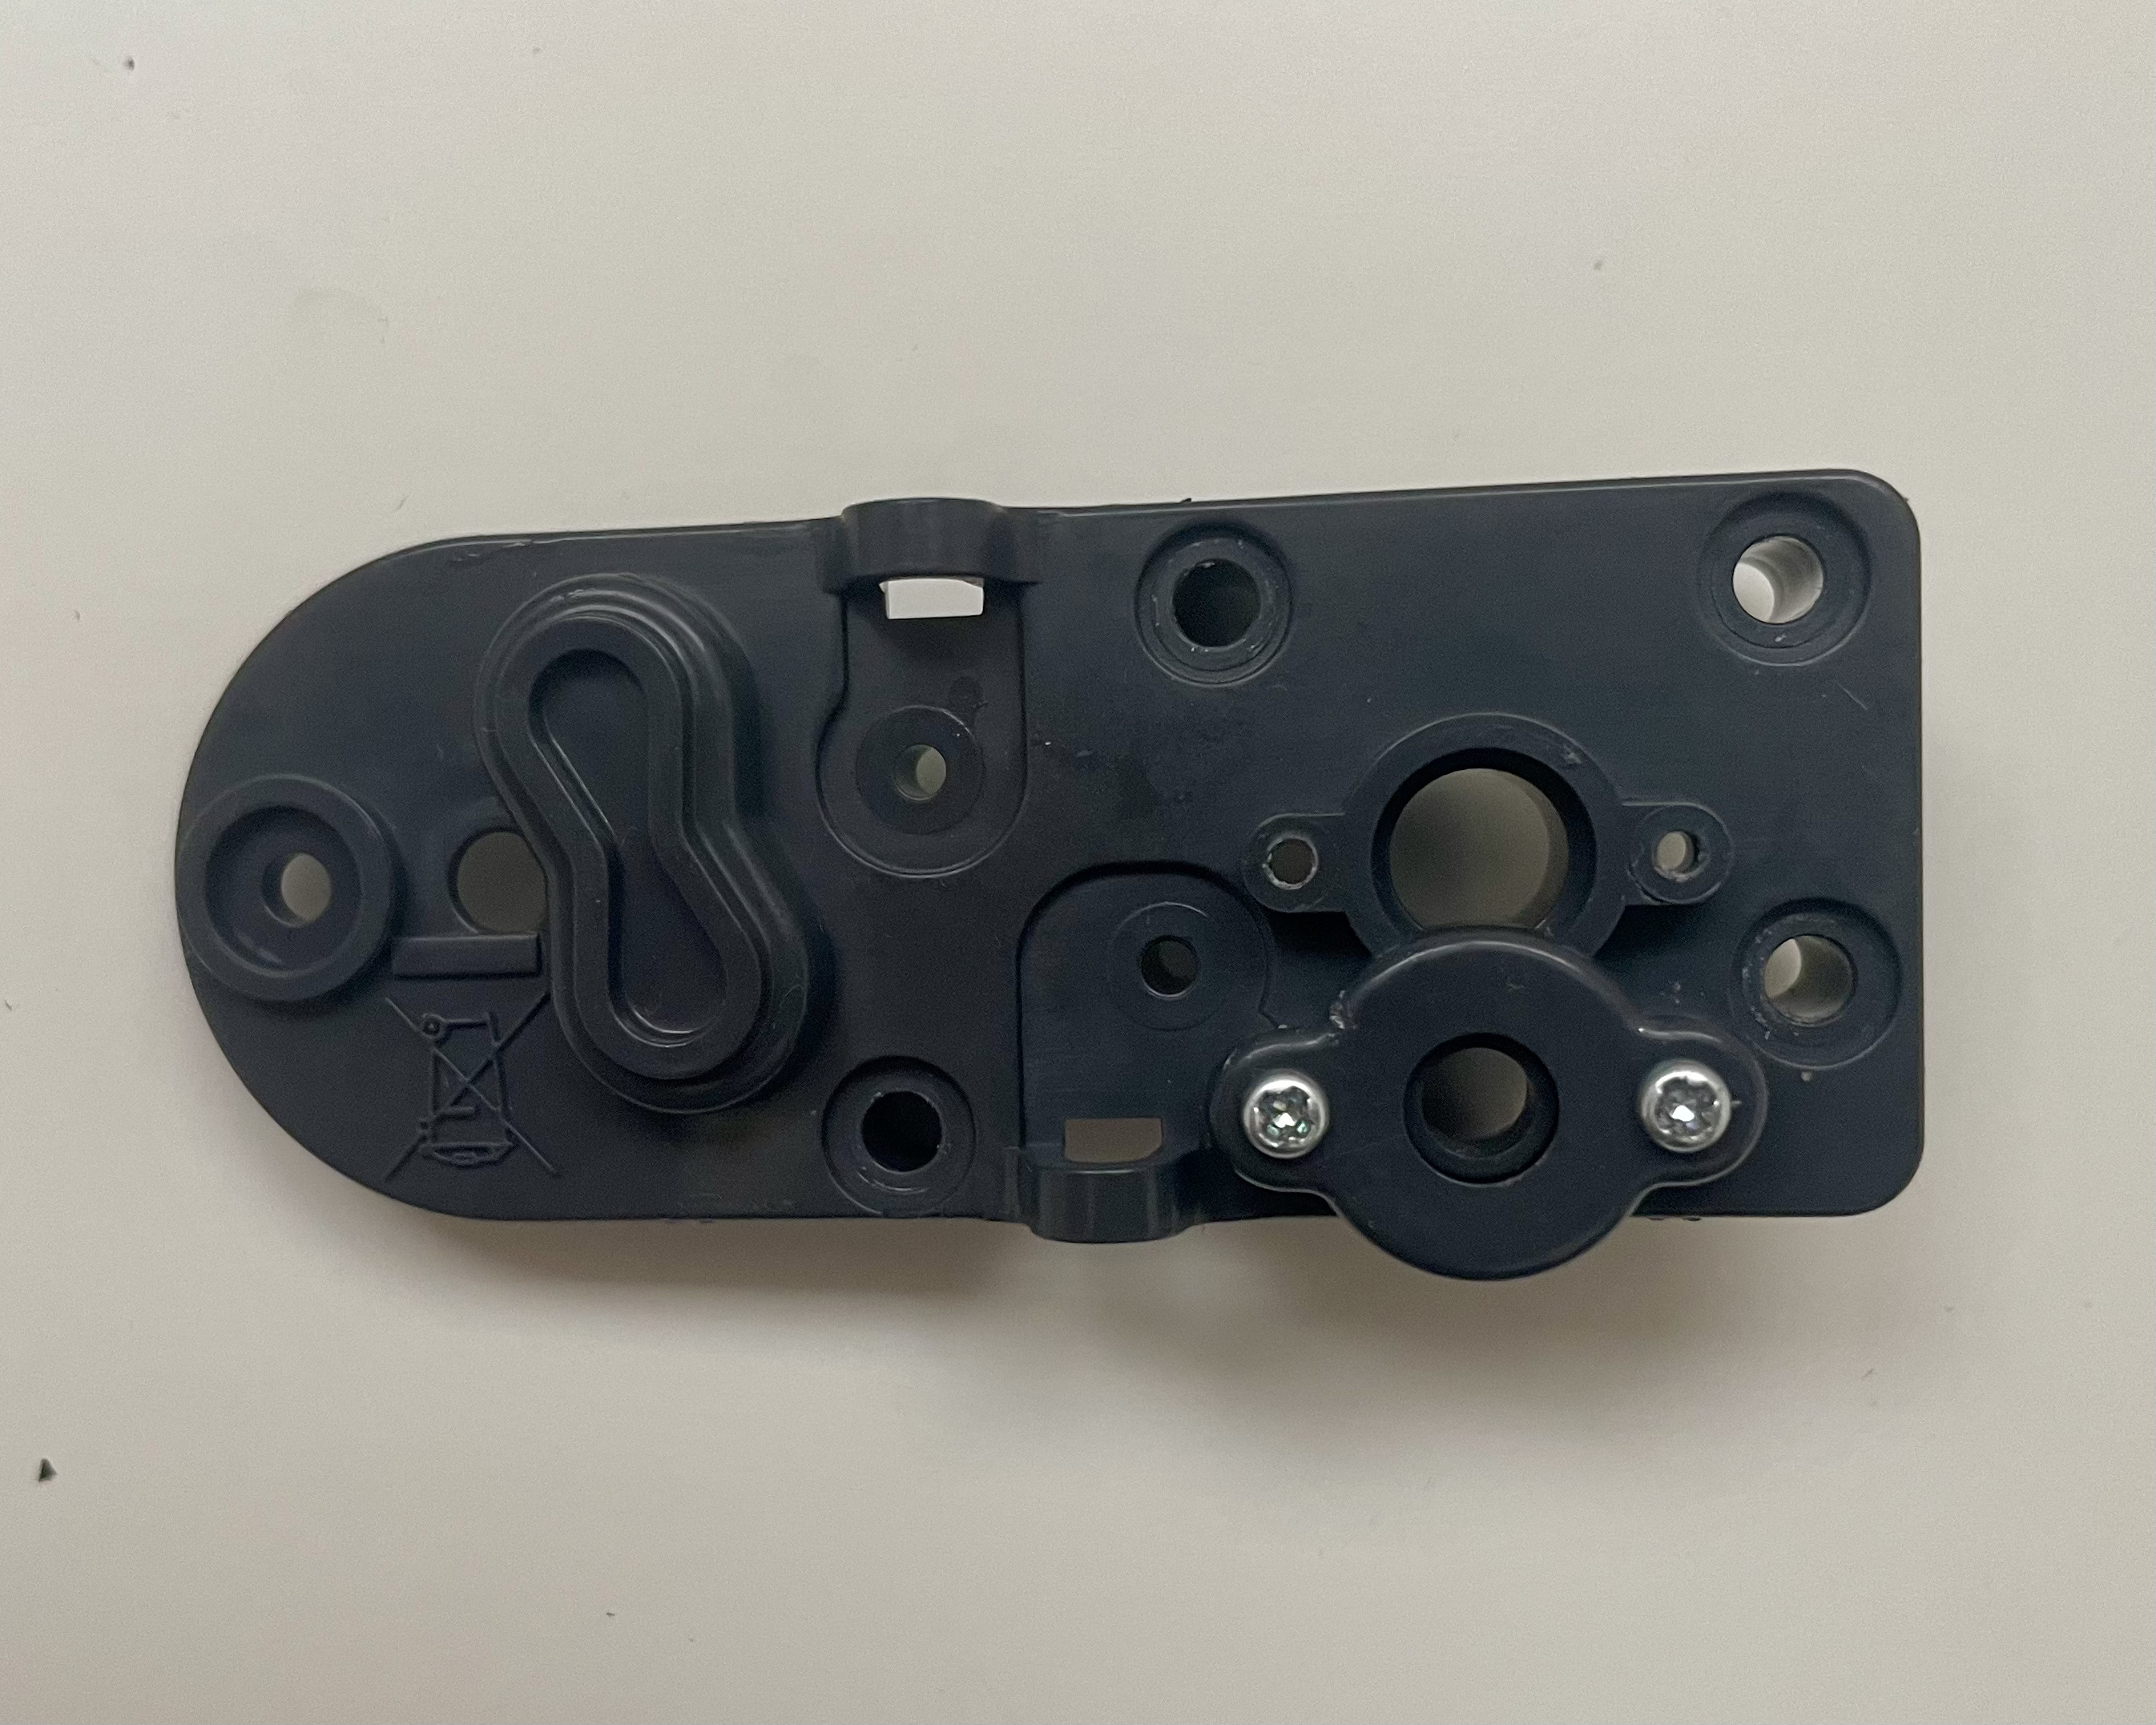
- Repeat steps 1-3 on part B7 as shown below.
Step 3 - Gear Box Assembly
Parts Required for Step 3
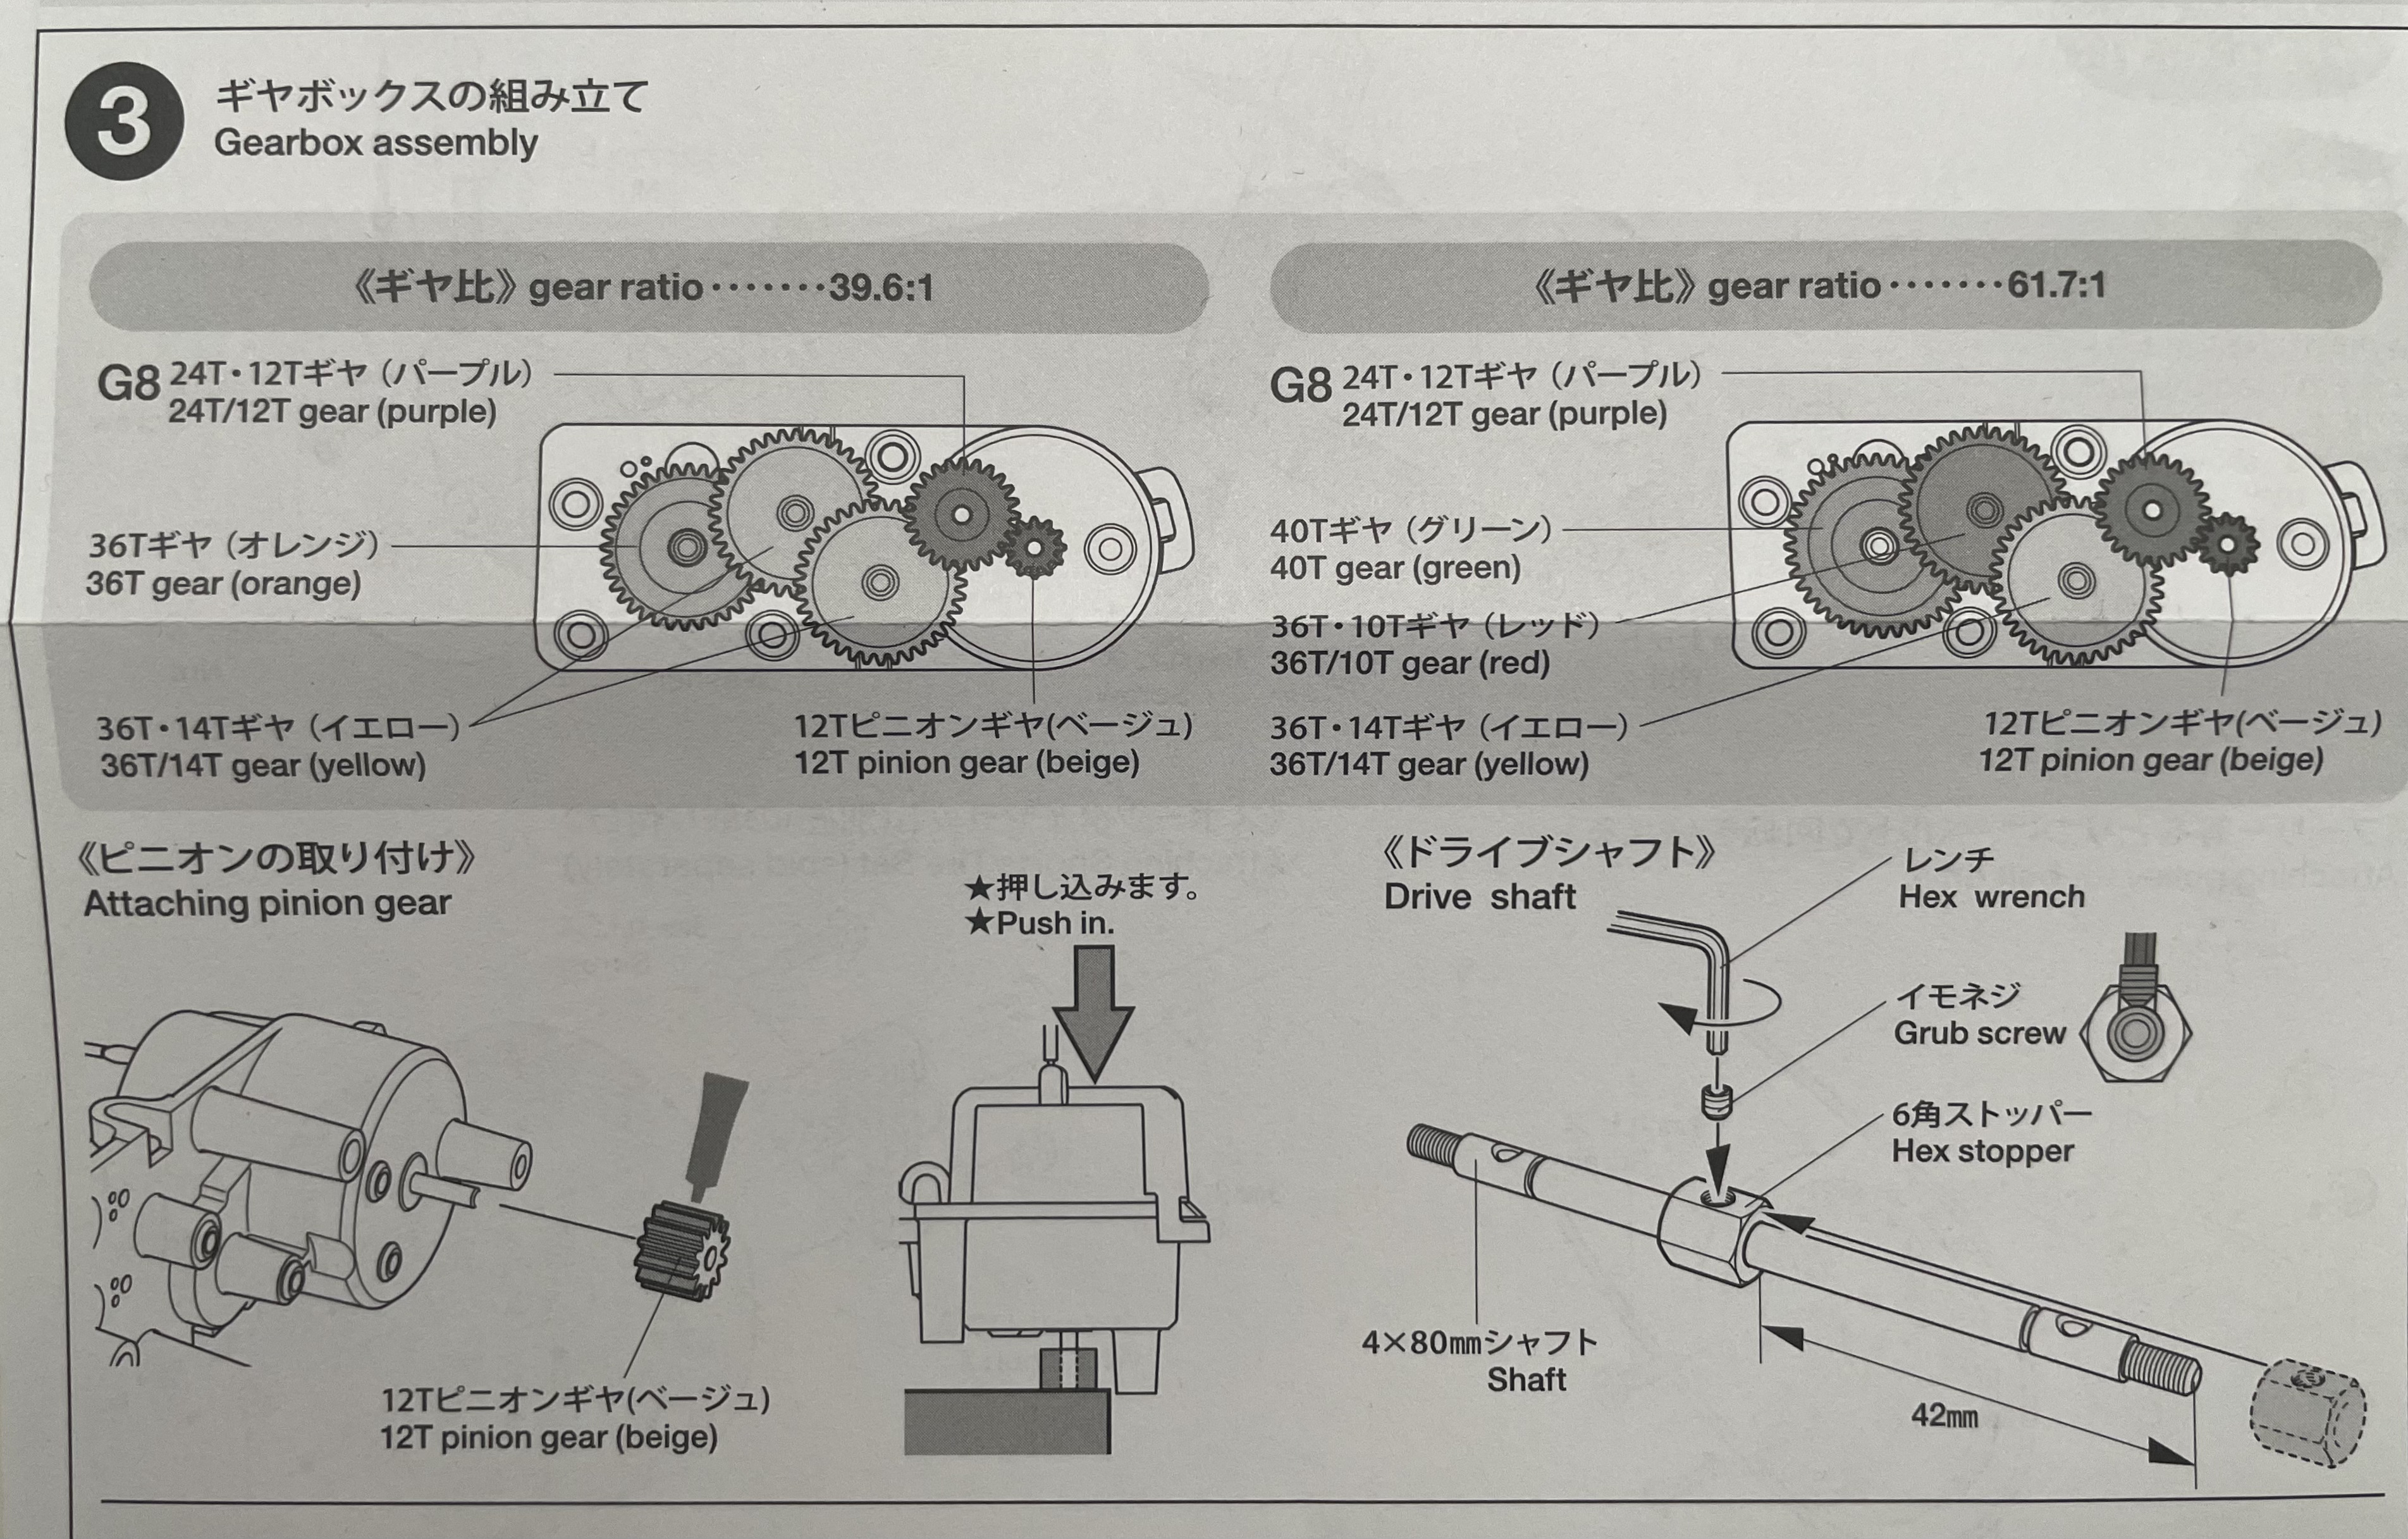
- Gears (Choose which to use based on the gear ratio and RPM you’d like)
- Drive Shaft (The one with holes)
- Grub Screw
- Hex Stopper
- Hex Wrench
- 13mm Shaft (Measure to confirm. Very important!)
- 3x18mm Tapping Screws
- 2.6x8mm Tapping Screw

- Place brown pinion gear on the motor shaft. Press onto the table to get in all the way as shown below.

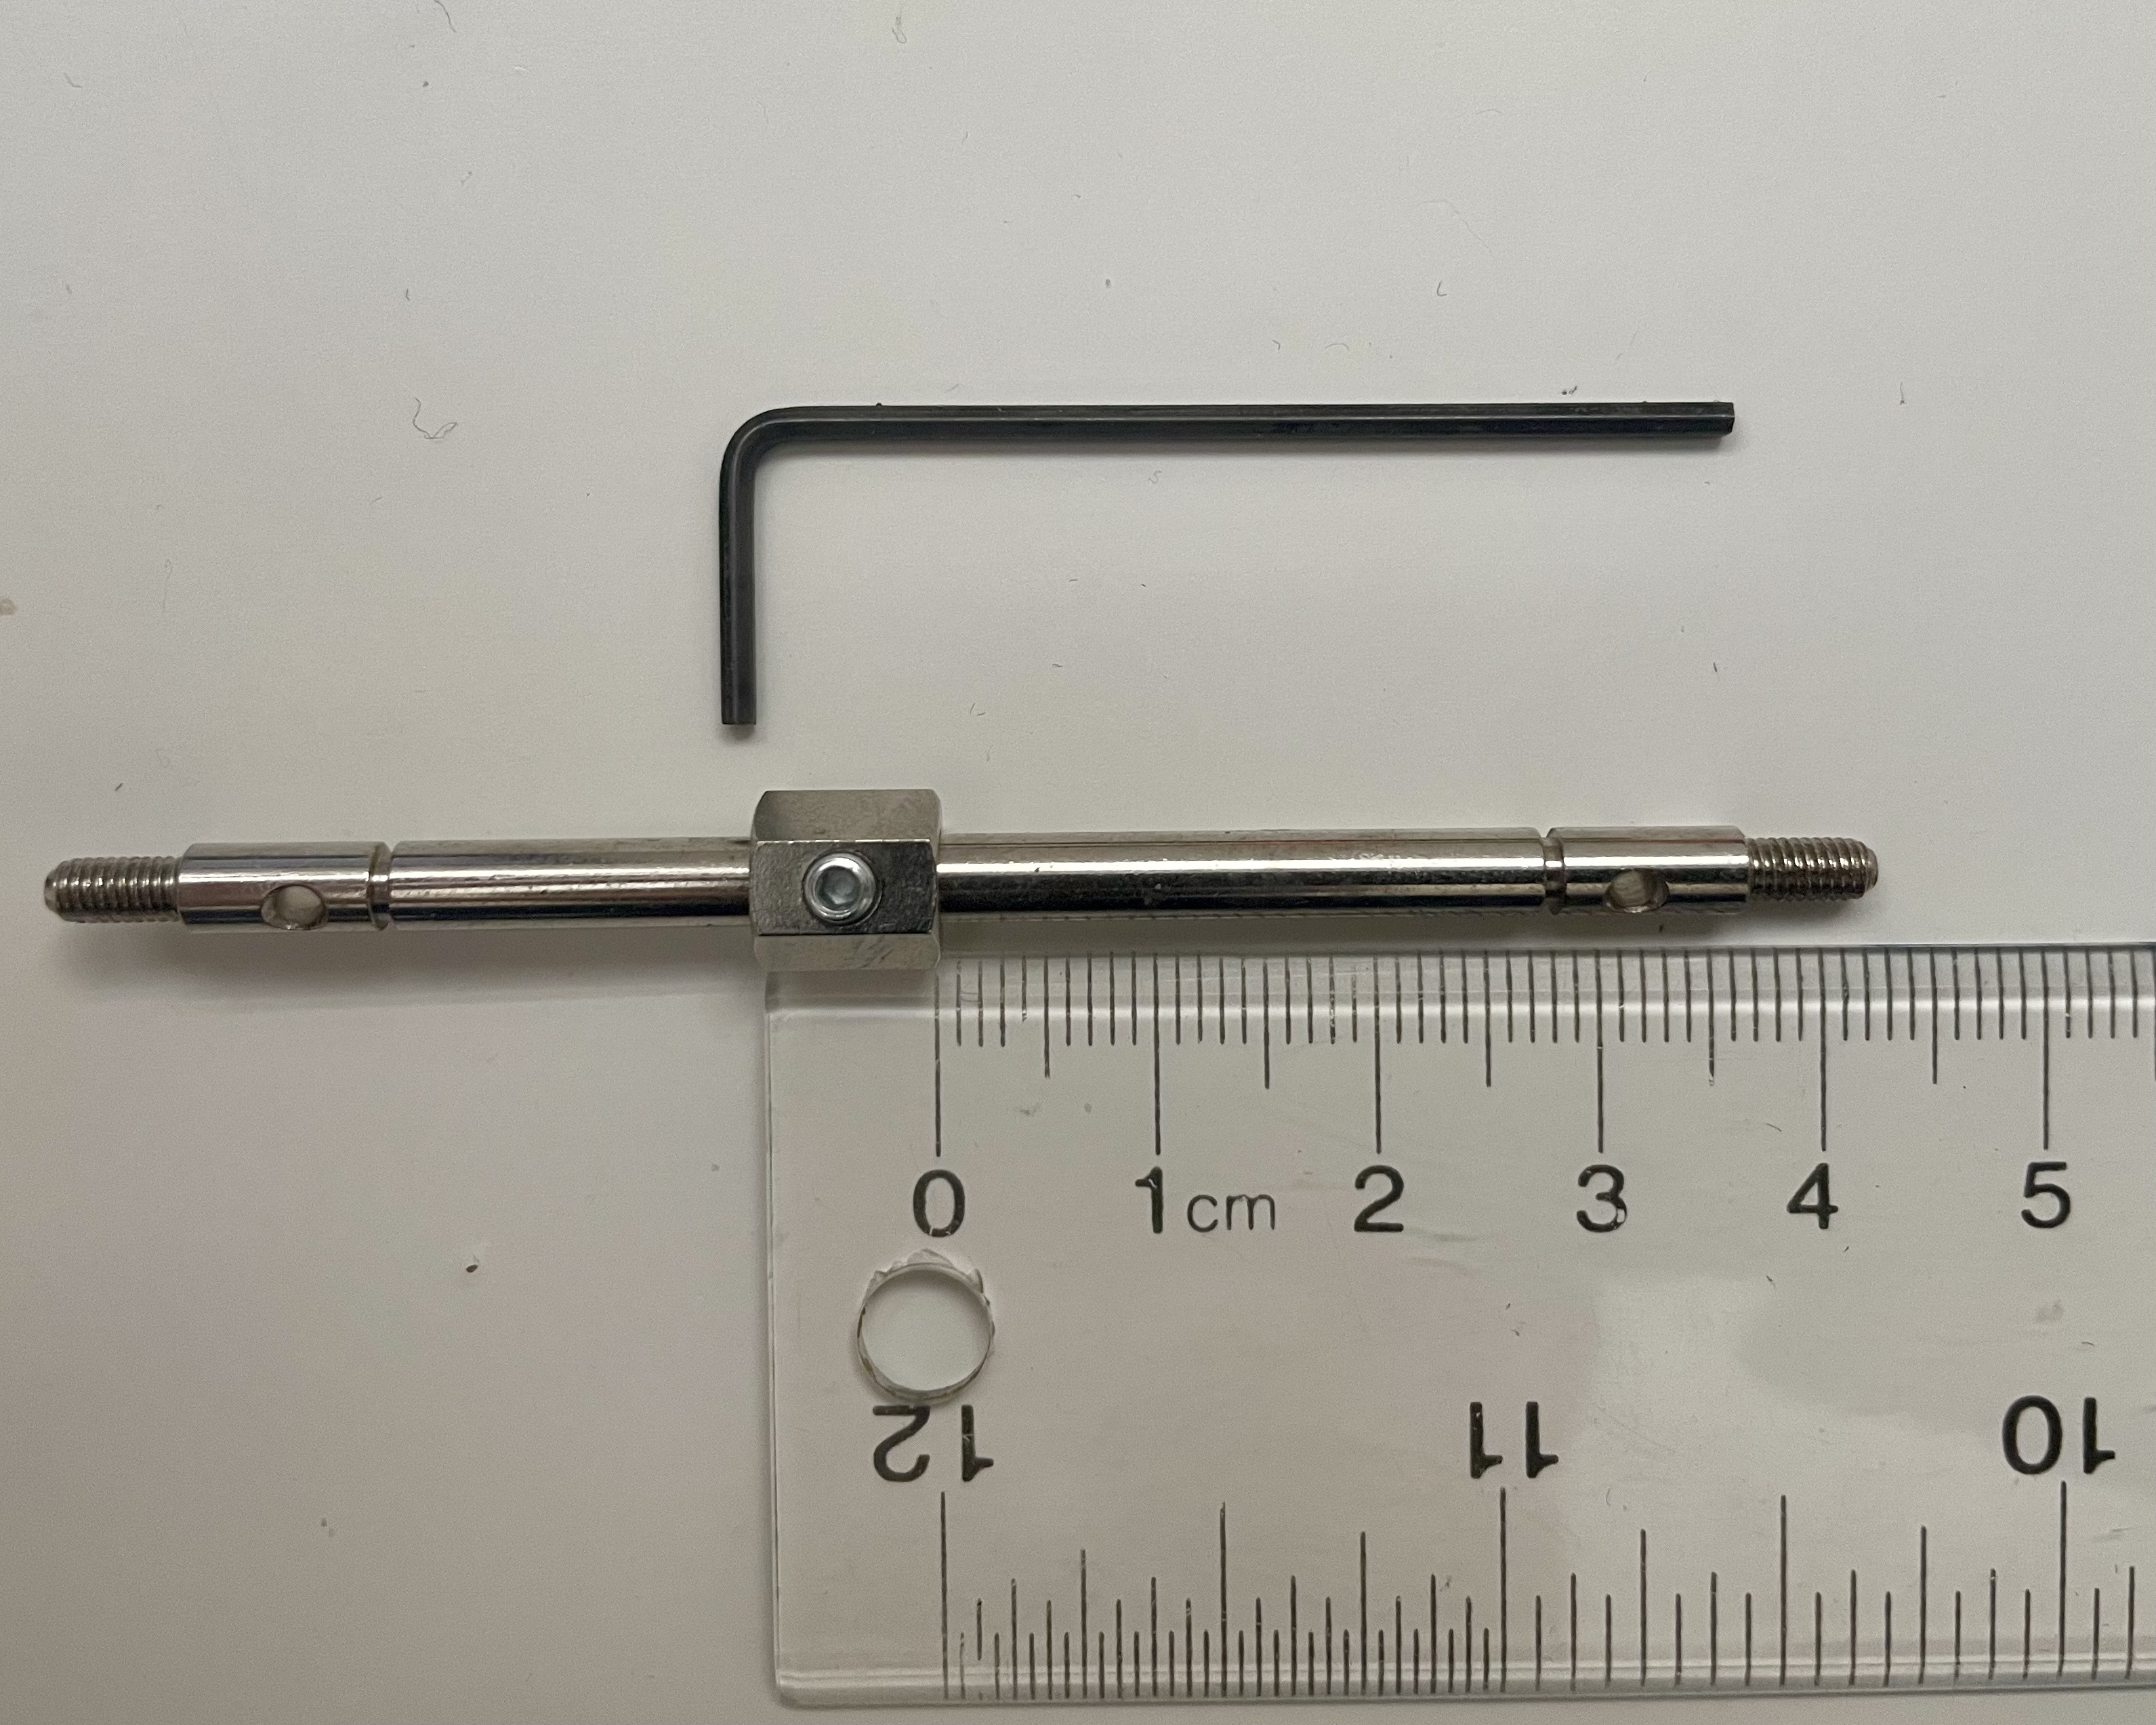
- Insert the drive shaft into the hex stopper 42mm from one end. Use the grub screw and hex wrench to secure the hex stopper in place as shown below.
- Select your gear ratio to determine which color gears to use (Hint: RPM of the different gear ratios will affect performance)
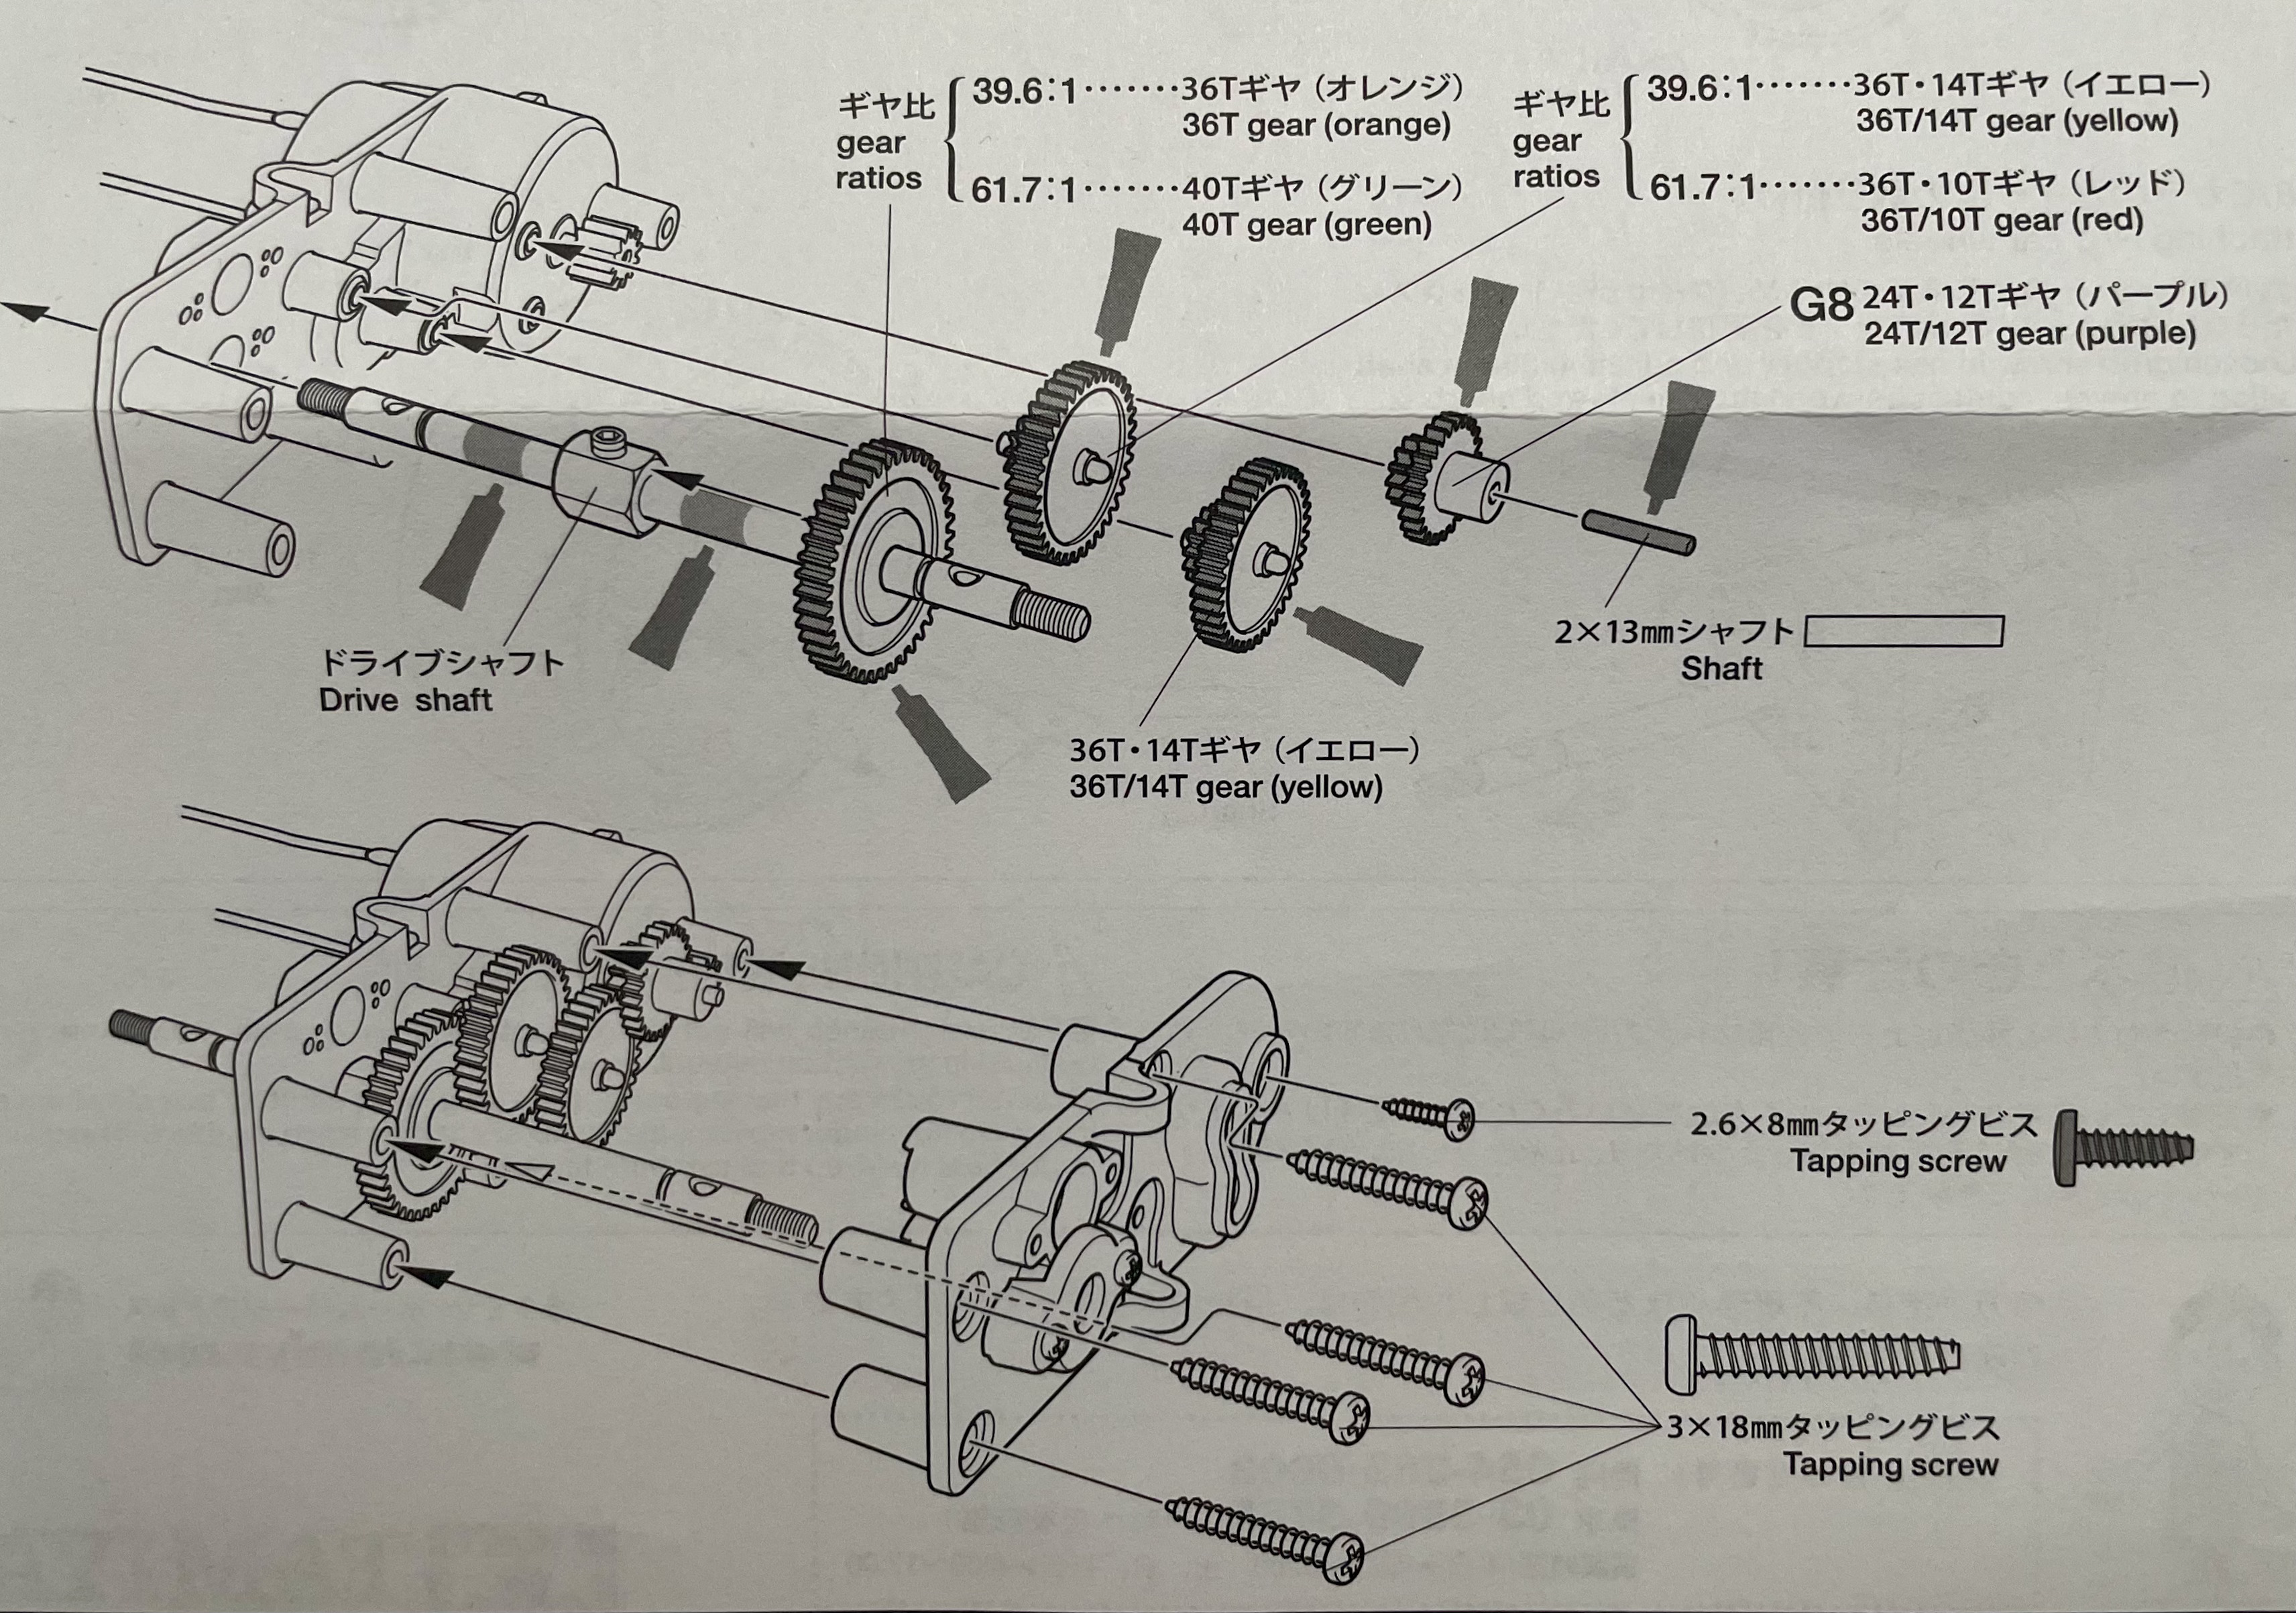
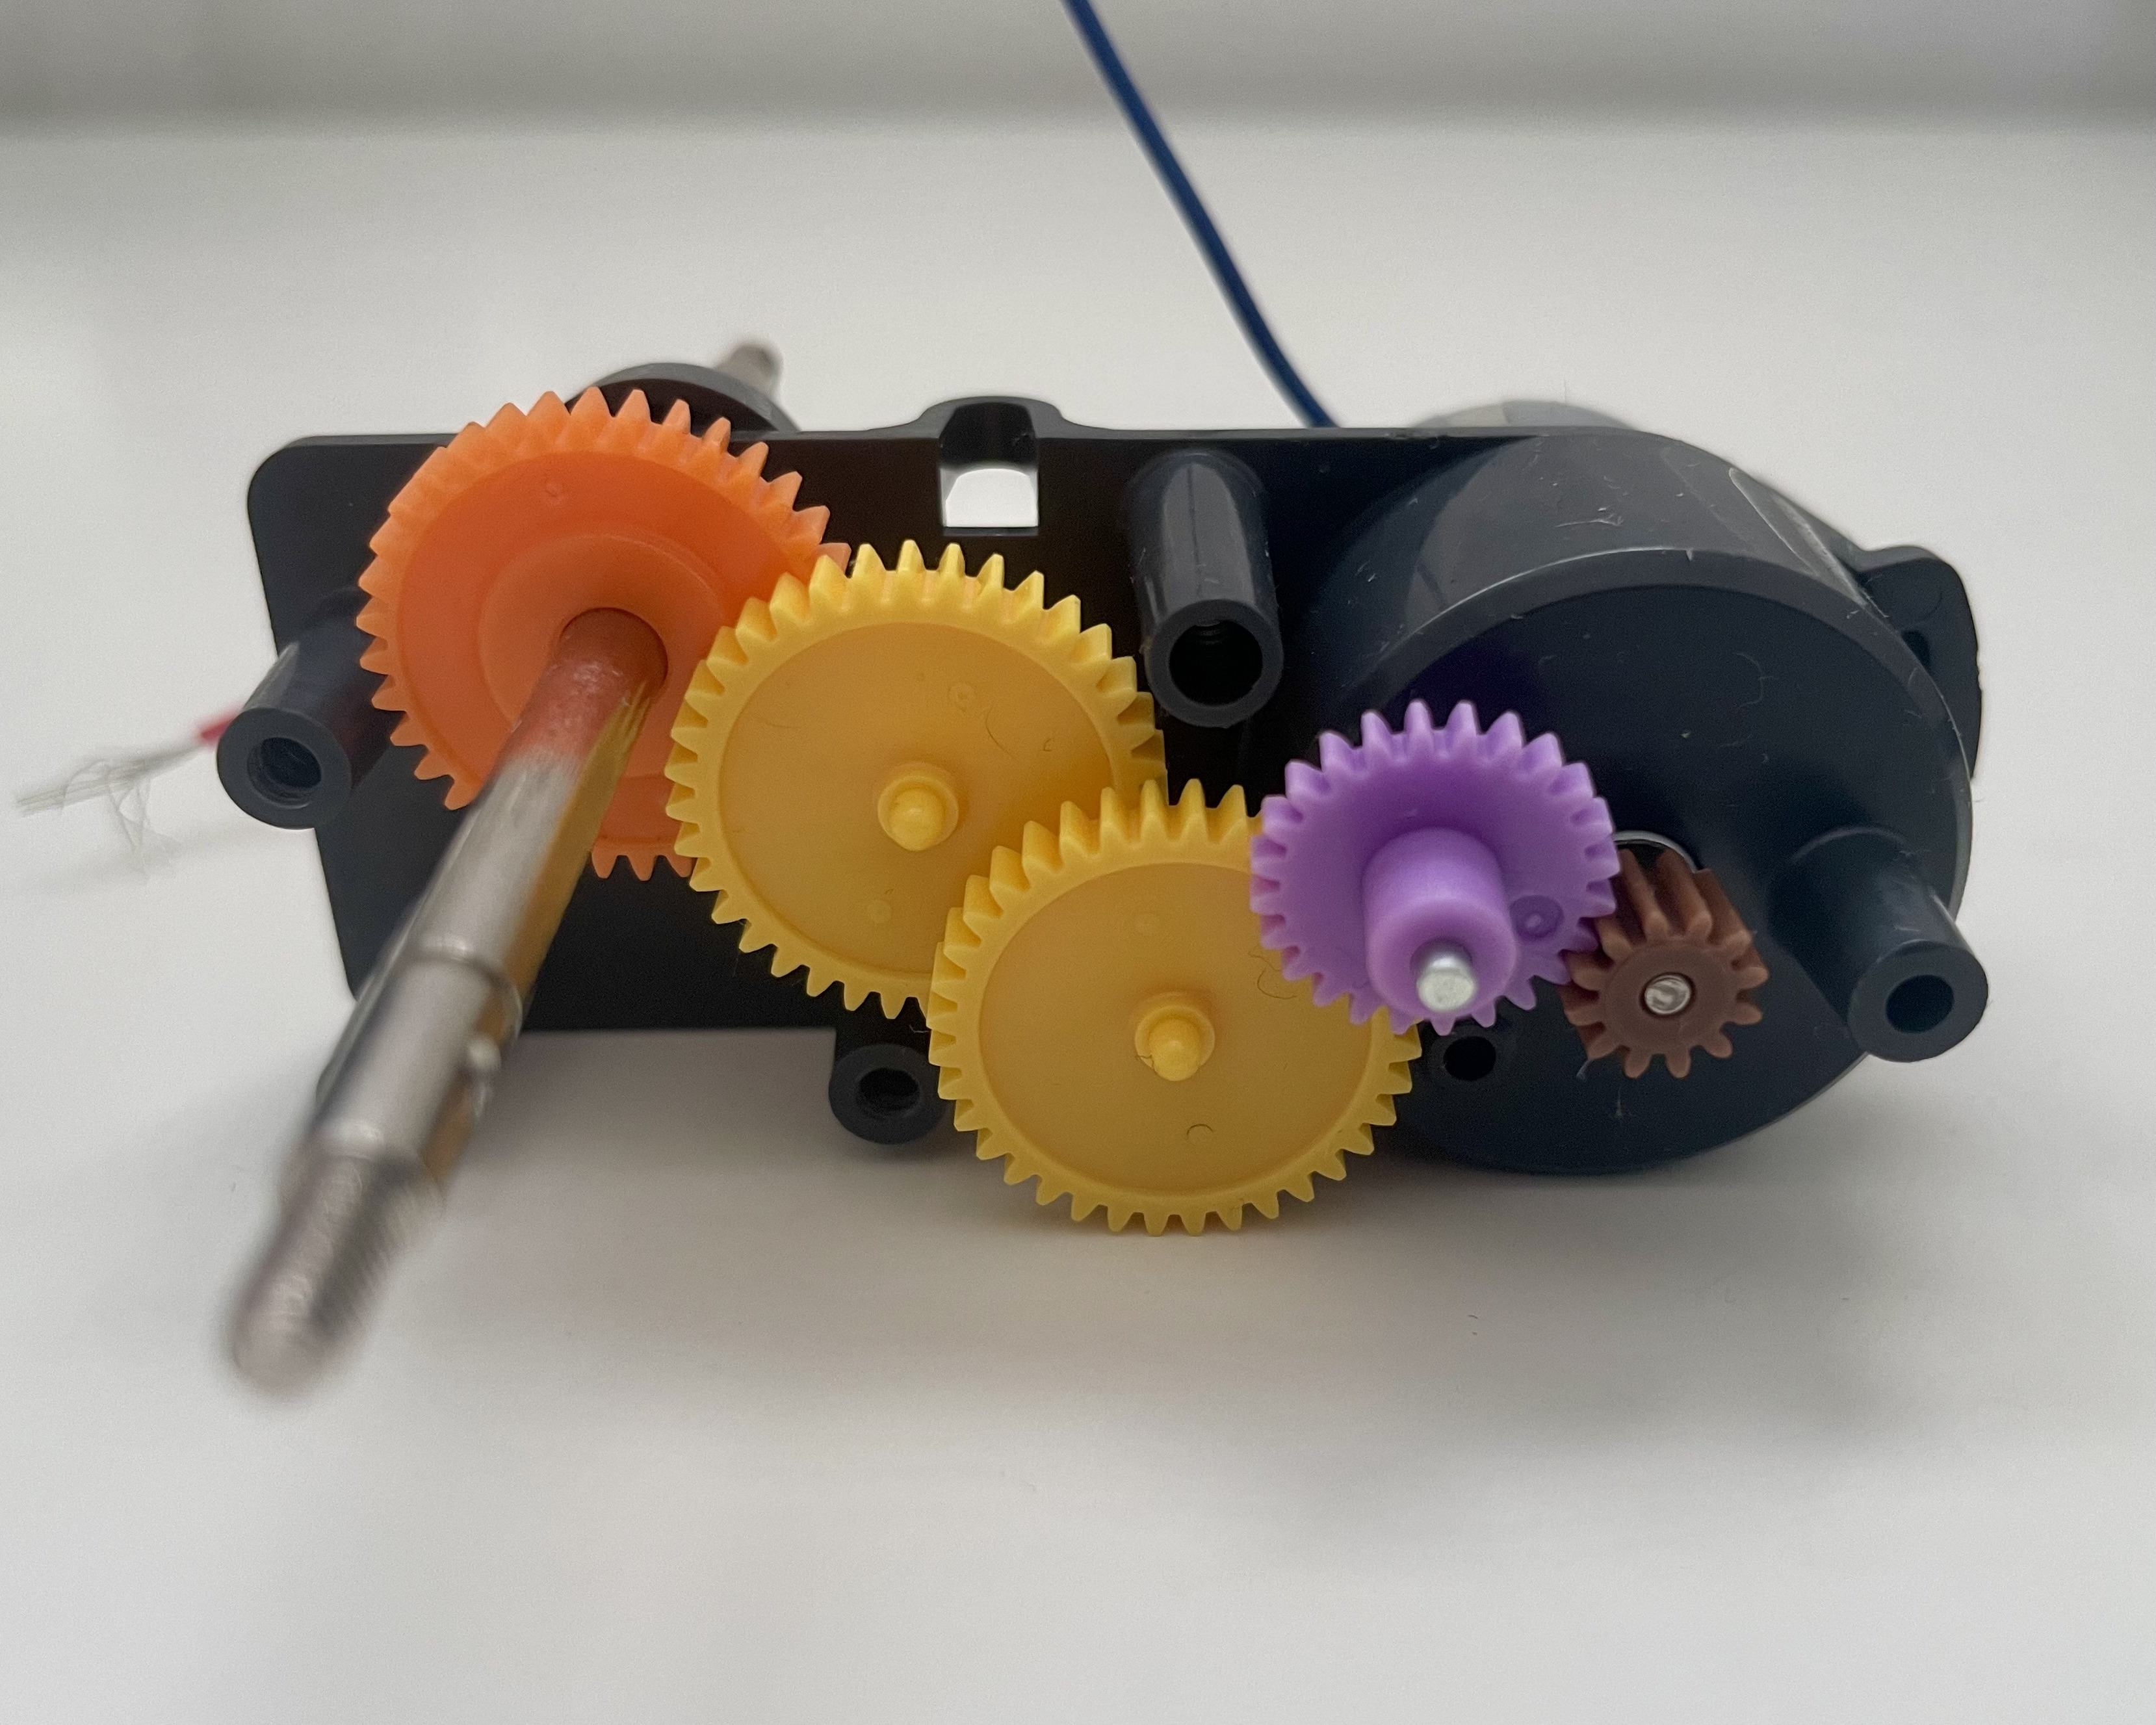
- Place chosen gears into part B6 as shown.
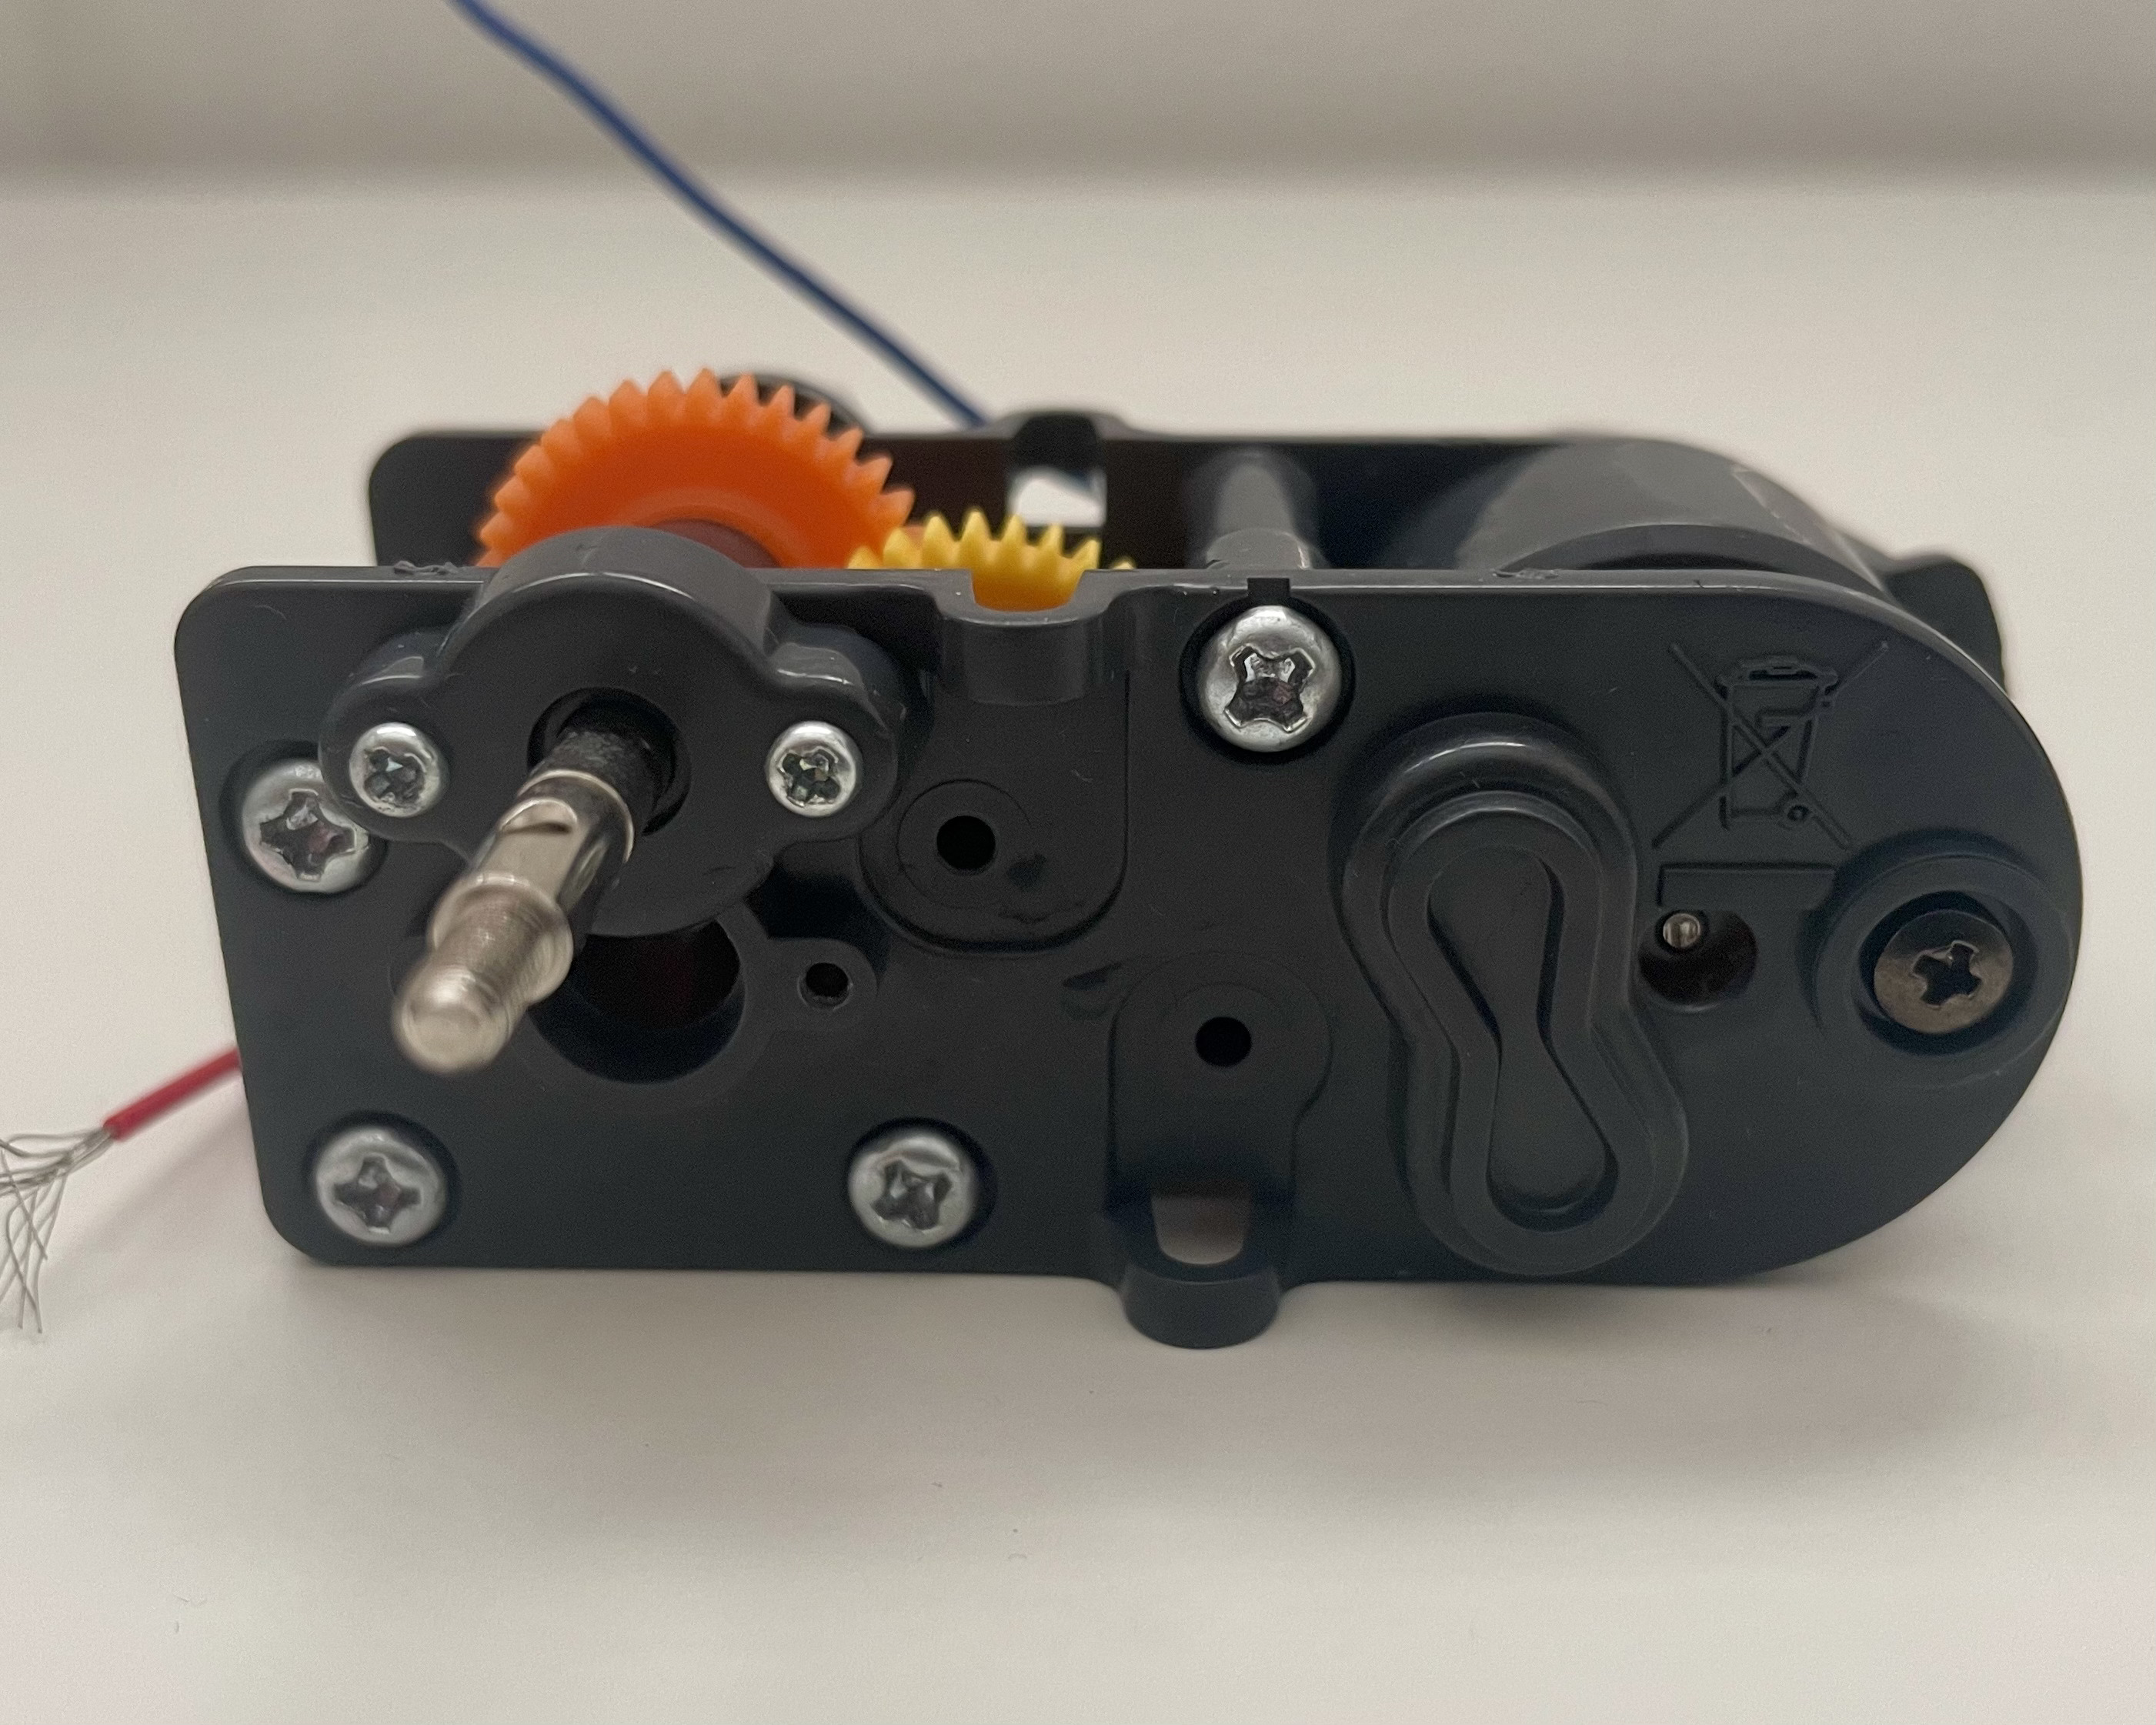
- Screw on part B7 to secure the gears in place as shown below and ensure the purple gear sets into place correctly.
- Finally, apply grease on the teeth of the gears.